Too Many Good Things Out There Not To Share Them With You!

Showing posts with label decor. Show all posts

Monday, March 1, 2010

Wall Art Display

 As the thought of an upcoming foster child continues to cloud my mind I was thinking of the ways I could encourage and foster lots of self esteem for the little person God brings us. Displaying and showing we are proud of this little person I know will be so important so here's a little post from How Does She blog. She has some great tips for displaying artwork and I'm sure there will be lots of it around our house! 

How Does She display kid’s art?  I knew I could find a few ideas, I had no idea I would find this many!!!  I am excited to present all these awesome ideas – I am so inspired to get my kids to make more art, just so I can display it!

 #1 Collage It

way to display kids artThis is Alison’s idea to take lots of art, shrink it on the computer and put it into one collage.  Child’s art 18 into 2!

#2 Group together on the wall

I love this idea because it is so easy to update whenever you want and it looks GREAT!
kids drawings as art
 The Style Files shares this picture.  I love all the colors against the white wall.    You can get these curtain holders at Ikea, not online, unfortunately, but if you live by one – lucky you!
work of art lofn
 The Land of Nod
art on wall
display kid art 2
display art magnet wall
display art photo
Cookiemag suggests taking pictures of the art and grouping the pictures together into a display on a cork board

#3 Treat it as art

This frame allows you to easily switch pictures and even store some behind the most recent art being displayed
art display zebra
Blissfully Domestic has a great tutorial on displaying framed art.
art on canvas
Turn it into art on Canvas!!!  This is one of my favorite ideas – pretty much anything on canvas just looks classy.
mykidsartoncanvas has the idea above on their website, you can order from them

OR
get it for free at Canvas People – click here!


 Turn it into custom wall paper art, a laptop skin, or a removable sticky picture at SticViews - You can still get one free – see this post to find out how!
Turn doodles into a real work of art - Lizette from Fine Doodles display art fine doodles.jpgdoes some amazing work with your kid’s doodles – you gotta check out her website!

#3 Take it with you and show it off!

display art jewelry 1
Analiese will turn it into a clay pendant for you
art display silver
or Totally out of Hand will turn it into silver or gold jewelry! 
display art bag
Snap Totes will turn images into bags or pillows – picture your kid’s art on the bag above.

Little Birdie Secrets has a tutorial on how to turn you child’s drawing
art display monster 1
into a stuffed toy
art display monster 2
I made one for my son and he thinks it is the coolest thing! 

Other ideas I found but don’t have pictures for are:

shrink and mod podge onto coasters
Use clipboards as frames – easy to change out
hang them all over your garage walls
use them for wrapping paper
display on picture ledges
upload them to a book printing company and have a nice book of art
laminate them and use as placemats
turn them into a calendar – click here to see how to get a FREE ONE
 cover your coffee table w glass and slide drawings underneath
use a plastic tablecloth over your dinner table and slide drawings underneath
have them made into postage stamps
cut up and use as gift tags

Sunday, February 28, 2010

Look What I Can Do........Shhhhh....... You Can Do It Too!

Many of my dear friends who I have let into my craft room know I'm an organizing junkie. I just feel better when I know where something is and I'm not wasting time trying to find it. Enter ribbon. I have tried to organize ribbon in so, so, so many different ways and always come up short ........dum dum dum. Until NOW! Check out this super easy way to make a ribbon organizer and moreover easy to take the spools on and off. Why didn't I think of that? I think I will paitn mine whit to go with the white theme going on in my craft room.

DIY Ribbon Organizer

It seems such a shame for something as pretty as ribbon to be shut up in a closet, wouldn’t you agree? I have this fantasy of storing all my wrapping in plain sight, as a sort of functional art, and this super simple project has me one step closer.
look at this pretty ribbon, all it asks is to be set out and appreciated
I’d call this a tutorial, but really, it seems too simple to be a tutorial. It’s just a trip to a couple of stores I’m guessing you already visit. A few minutes later, you’ll be set with a place to store every spool of ribbon or twine in your closet. Should we get going then?
Start with a trip to the thrift store.

Have you ever noticed many candlesticks have a hole that goes all the way through? Do a little searching and I’m sure you’ll find several. On my last trip I picked up five. They are ripe for the picking, my friends. If you don’t like your color options, pick up a spray can of Krylon at the hardware store and do a quick paint job when you get home.

Often you’ll need to unscrew something. It wouldn’t hurt to have a Philips and flathead with you when you go.

The next stop is the craft store. Pick out a wooden dowel that makes a snug fit. Mine was pretty snug. The wood was soft enough that I just screwed it right into the base. If your dowel is a little thin, you have options. Pick up a wooden disk while you’re at the craft store. Drill a hole so you can use the wooden disk as your base, then plant the dowel in the hole (again, make sure it’s a snug fit) and slide the candlestick right over. You also have the choice of picking up one of these from the hardware store, they’re called allthreads and work great for this project if you prefer them to a dowel.
That’s it. Once you find a dowel or rod that fits, there’s nothing left to do but stack the candlestick back together, and display in your studio, office, or right on your mantle.

Saturday, February 27, 2010

Pottery Barn hack job and back to crafts.....for now. I love you sweet pottery barn but you kill me with your pries so I must, and I do mean MUST make it on my own. Love ---me. Tear. I know you love PB too so here's how to do a PB lamp shabby chic cottage style.

It's no surprise that I'm hacking Pottery Barn. We went in a few days ago, and I found some things I love. One was this lamp. $100? Uhh... no.
I also fell in love with this shade. $59? No, thank you very much.
But, you know me, I can always find a cheaper alternative!
I already had the shade, it used to be my dining room light, picked up at Goodwill for $2 back last summer. Yesterday, when I went thrifting with {Living With} Lindsay, she spotted the lamp for $7. She is genius!
Using my favorite cheap white spray paint (thanks to Mother Nature for letting the sun finally shine today), I gave the lamp acouple of realllllly good coats. Then I roughed it up with sand paper.
 Madeline and I mixed up a little raw umber paint with some Ralph Lauren glaze. Mixing in some paint means that not every distressed finish in your house looks exactly the same. It gives it a little more depth and variation.
Wipe it off in circles, so that you don't have wiping marks left over.
 Once finished distressing, set aside to let dry.
Next go make some tea. Or coffee. Either will work.
I used leftover tea bags from making today's batch of sweet tea.
{We go through a gallon a day!}
Once it's cooled, "paint" a couple of coats of tea onto the shade. If your shade is already the color you want, skip this step. Blot with paper towels to help absorb the excess. Set aside to dry - or blow dry it with a hair dryer (I'm impatient!). I did this while my spray paint was drying.
Just like with last week's curtains, translate your favorite phrase (mine is from a love note Mr. SCC wrote me years ago), and print it off, I used this font at 175 point.
Trim your words and tape them to the inside of the shade.
Put the shade on a lamp and painted it, just like the curtains.
I used a Paris postmark rubber stamp for the postmarks.
A $159 lamp for less than $10. I'm. In. Love.

Saturday, February 20, 2010

Just in Case

One of my favorite new things to do now is make my own candle holders. I posted this before but just in case you didn't get it I have a second post here from how to be awesome blog. I don't really care for the zebra theme just cause I'm not into that but your creativity could run wild on that part.

DIY Candleholder

A few weeks ago when I was suffering from a broken heart, I threw myself into crafts instead of drinking; fancy that! I’m so grown up! So here is a pair of candleholders that I made:
008
First, I started with candlestick holders and cup-ish things I got at Dollar Tree.

009
I glued these together using E600 glue. (I hate this glue because it is smelly but it is nice for this because it doesn’t dry right away so you can move the cup around on the base if it’s not centered on your first placement).

010
I took some tissue paper that I had lying around and decoupaged it to the outside of the cup. Despite its modern flair because of the zebra print, I think it still works with my other non-modern decor because of the neutral colors.

031a
Then I glued a piece of teal ribbon around the top and glued three maroonish buttons to the ribbon. The pictures don’t really do the color justice, I swear they don’t look as jettie-ish as they appear in the photo.

023a
I placed tealights in both holders. The total cost for these candleholders was around $6–you can’t beat that and I don’t think they look cheap.
I was originally going to do this with scrapbook paper but was glad I had tissue paper on hand because the light really shines through on the tissue paper.

Wednesday, February 17, 2010

Robin's Eggs For Easter

This is sooo cute. Check it out and super easy!!!

Morning, everyone!  Your very own crazy crafter, Jess from Mad in Crafts, here.
Are you cheap?  I am.  I have a little panic attack anytime I see a price tag in the triple digits.   Do you like pretty things?  I do.  When my house is clean and decorated, sometime I just sit and look around at it all.  Partly because I know it will be many moons until it’s actually clean again.  Anyway, because of my remarkable cheapness and love of pretties, you can imagine the internal torment that overtakes me when I visit the Pottery Barn website.  ((shudder))
A few months back I wrote a couple of posts called A Dollar Barn Christmas where I took items I found at my local Dollar Tree and turned them into home decor that was inspired by all the goodies at Pottery Barn.  I was browsing on the PB website a few weeks ago, and got that lovely crafter’s voice in my head.  “I can make that.  I could make that too!” 
I am adding a series of posts on my blog, Mad in Crafts, with tutorials on how to make PB-ripped off Easter/ Spring decor for your home.  The first post in the series showed how to create the elements for a fancy Easter centerpiece based off of two PB catalog items.
Today’s tutorial is redonkulously simple and would be a fun project to do with any bored, little ones you have moping around the house.
To make Robin’s Egg Vase Filler, you will need:
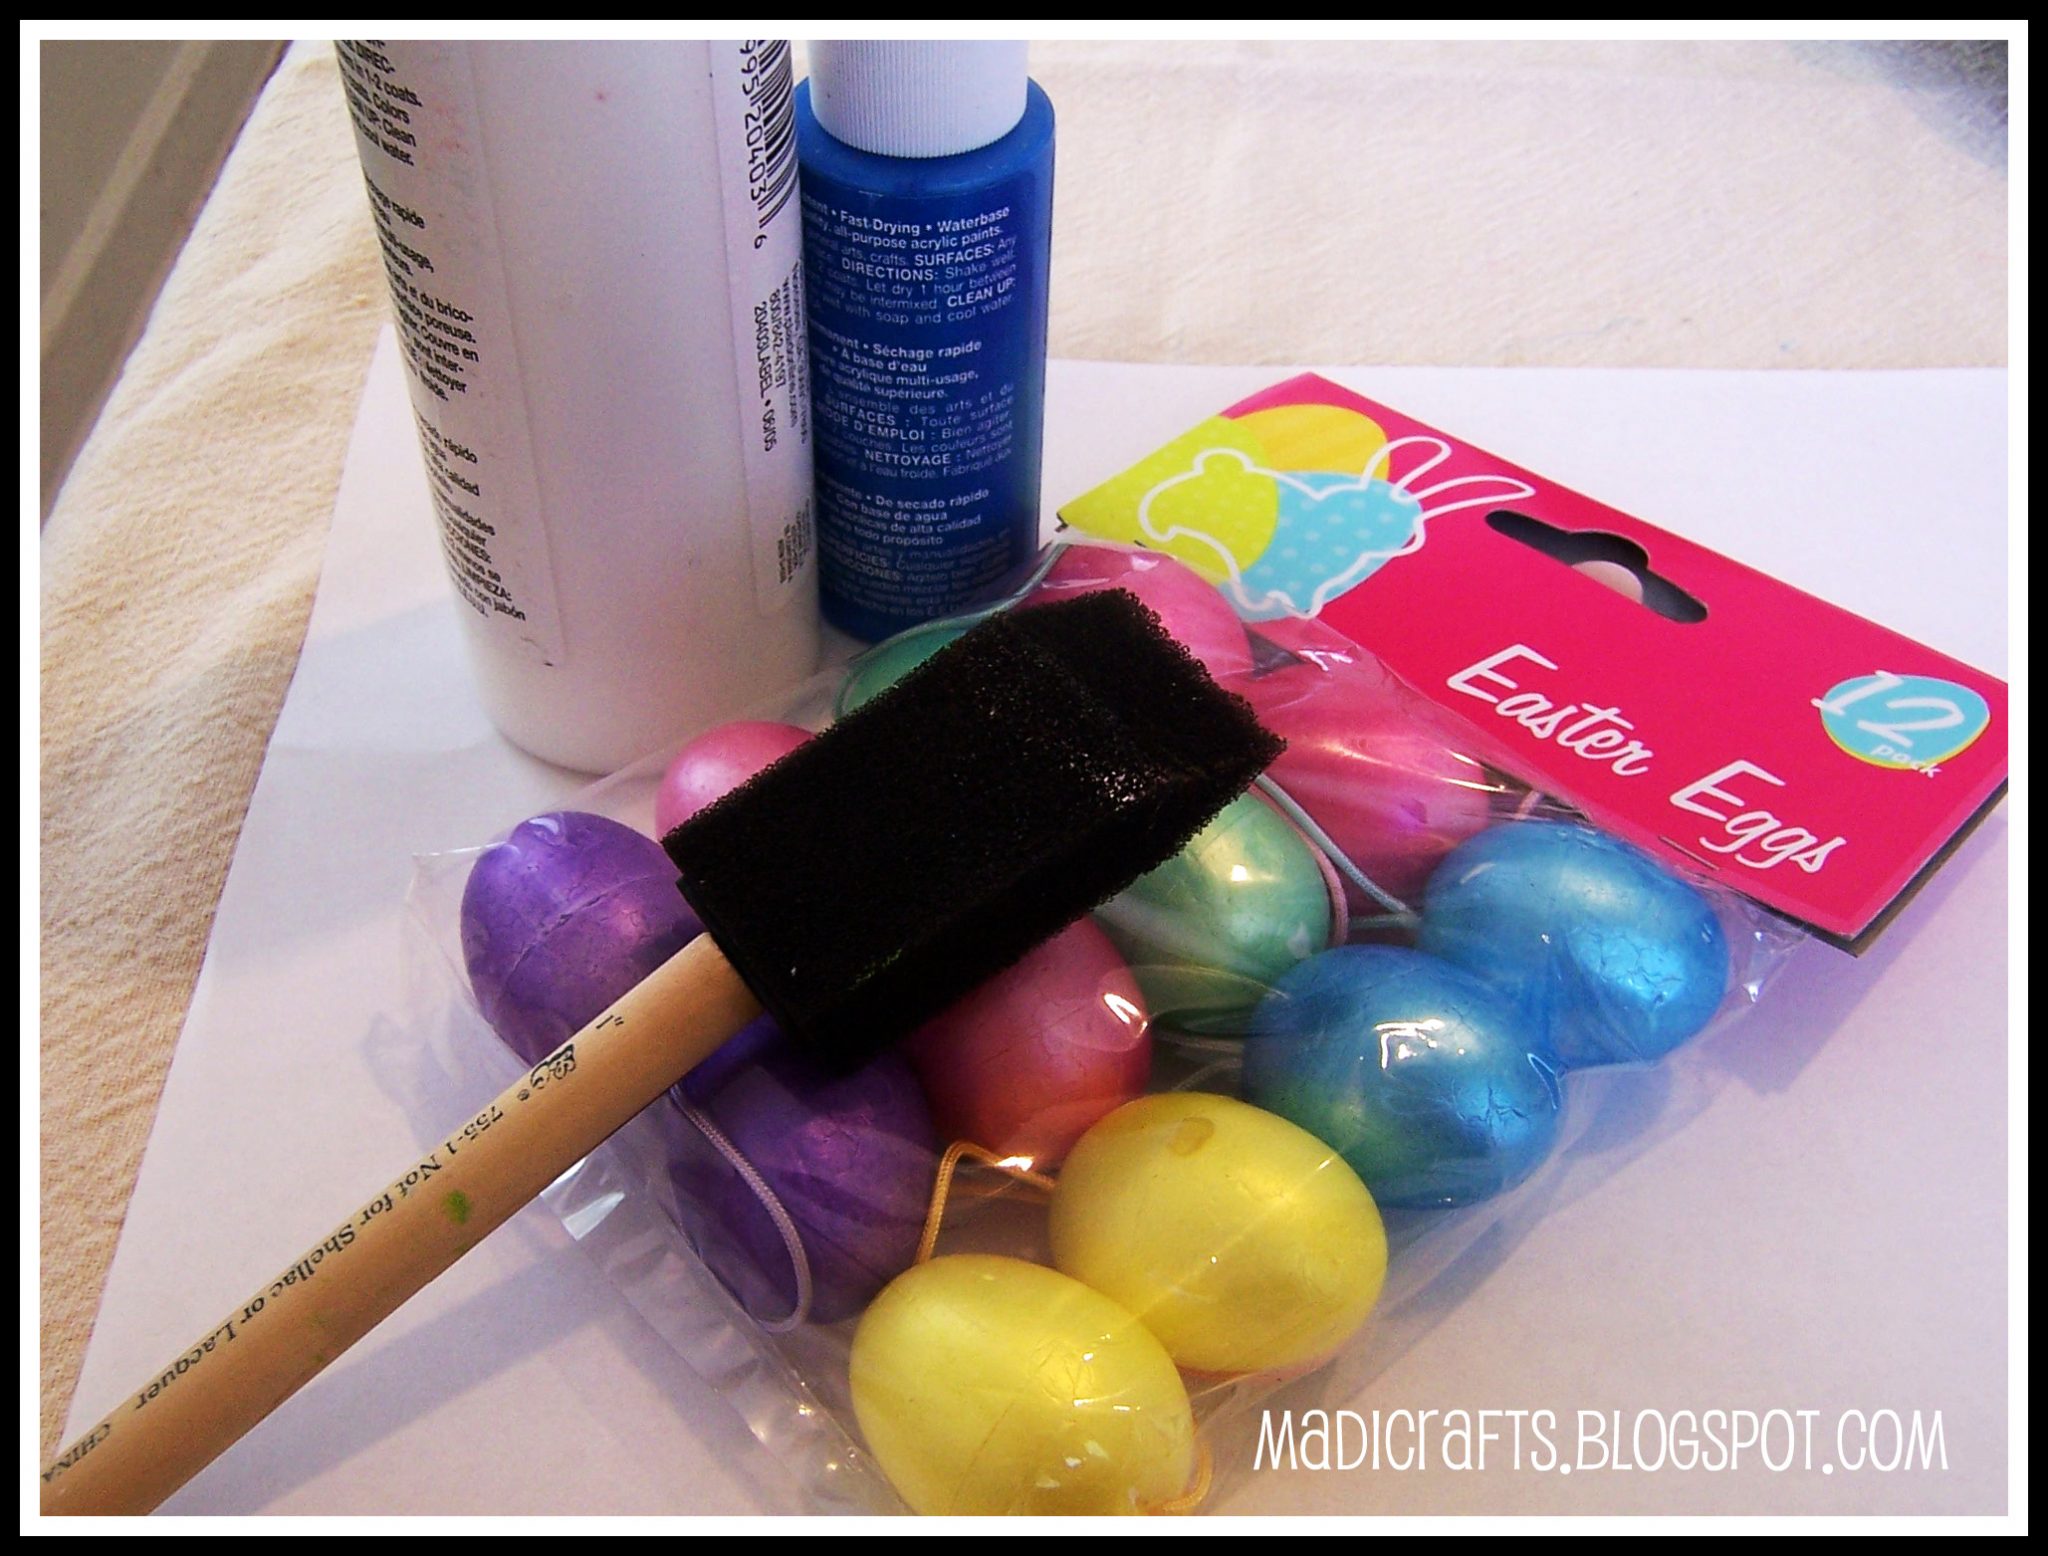
  • 1 or 2 packs of 12 styrofoam easter eggs (Dollar Tree): $1 each
  • craft paint in robin’s egg blue: on hand
  • craft paint in brown or black: on hand
  • paintbrush: on hand
Total: $1
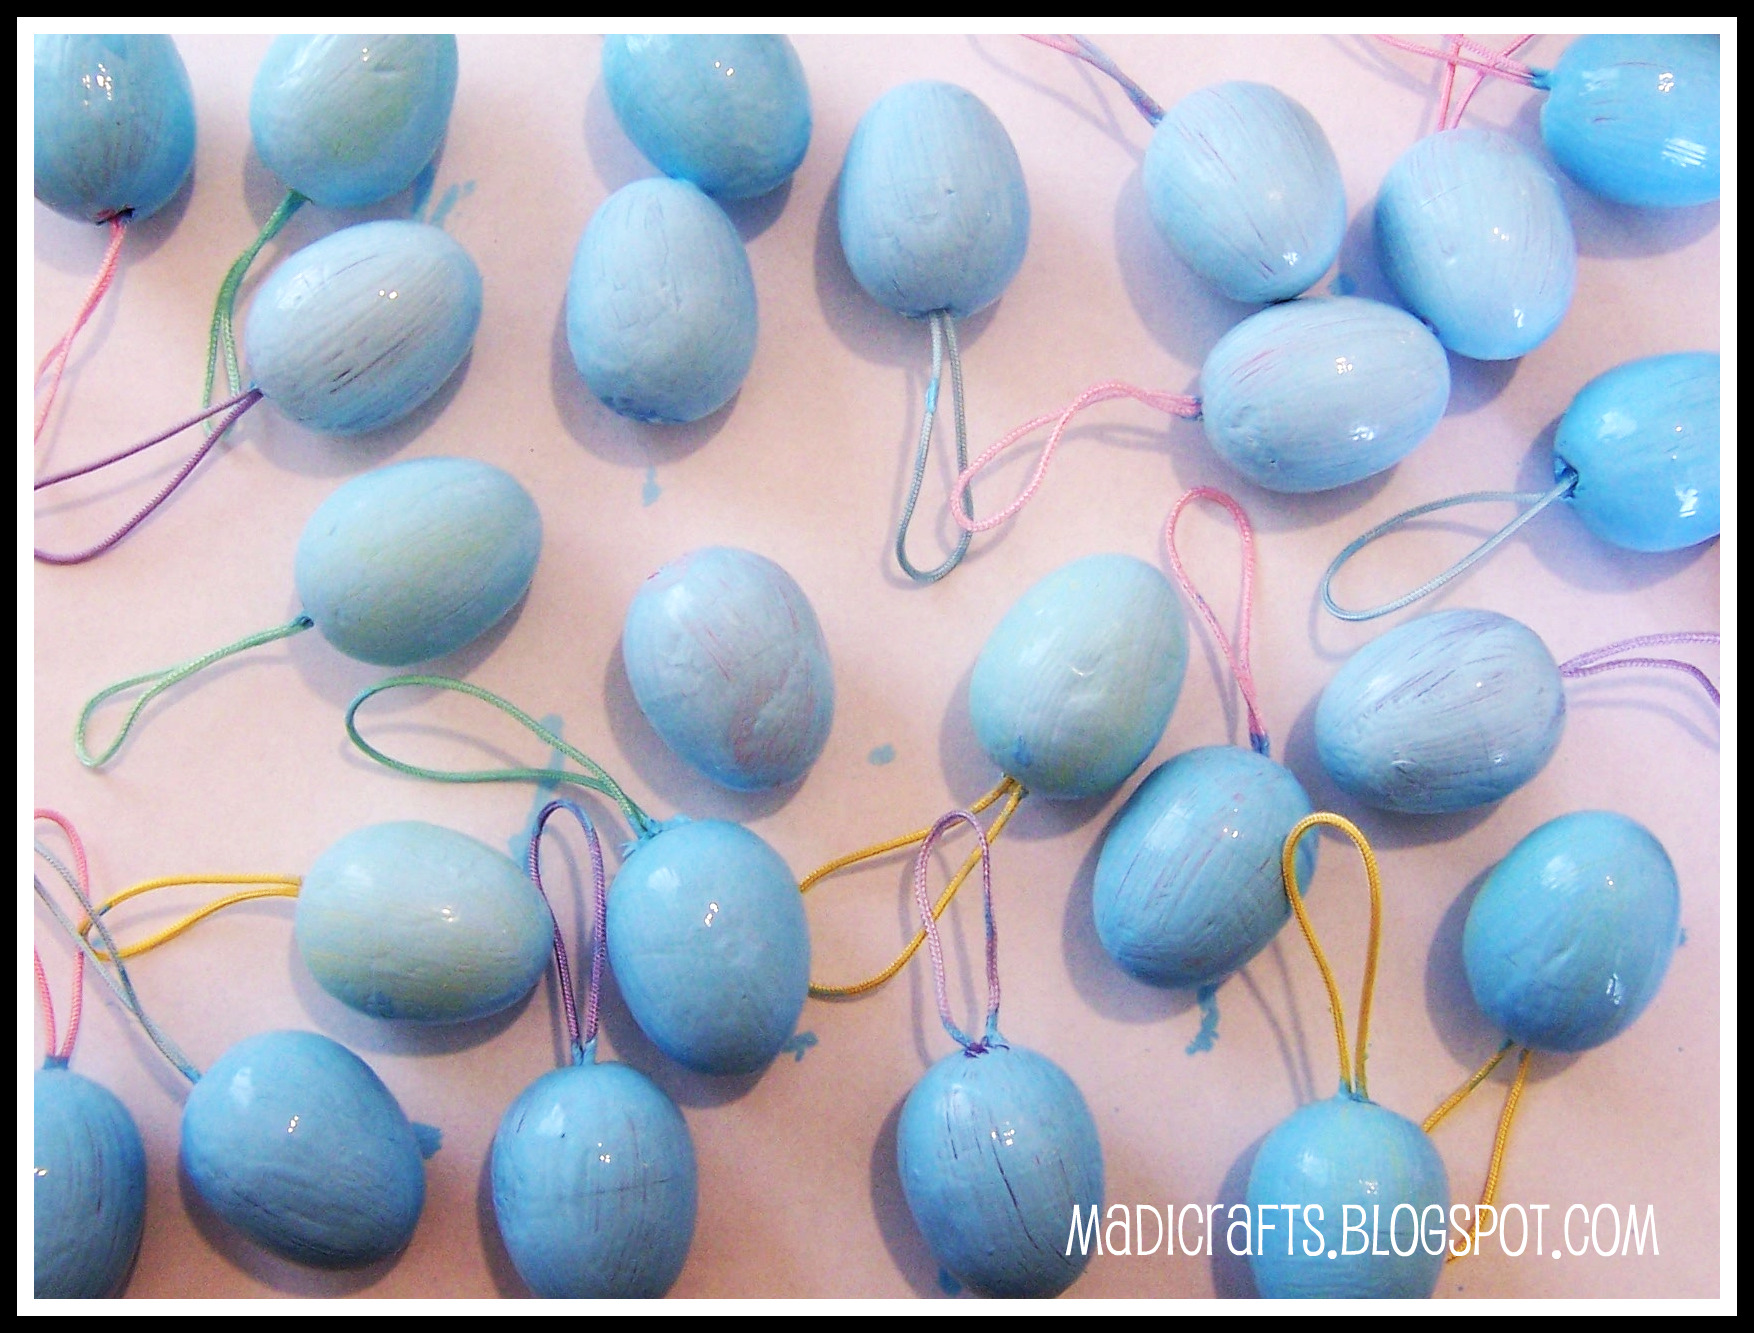
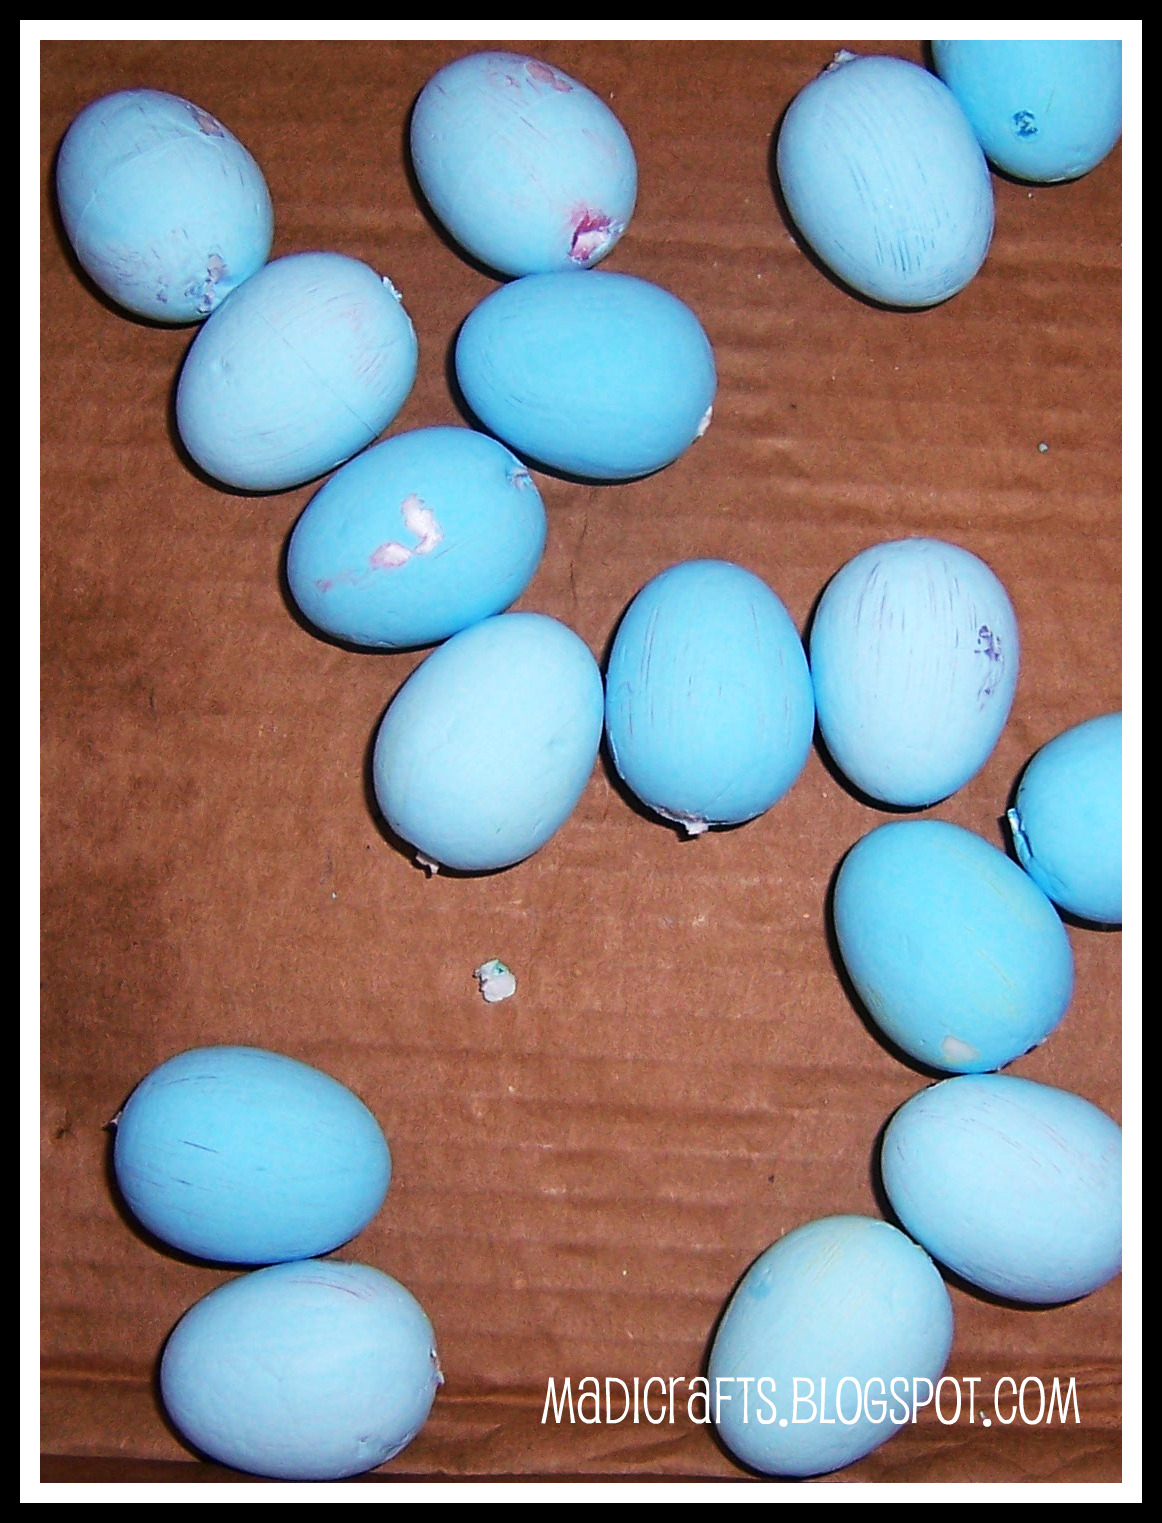
I mixed up a few craft paints until I got a color that I thought made a reasonably good robin’s egg blue color.  Holding each egg by it’s handy little hanging loop, slop some paint all over each egg.  Let dry.  Even though one coat didn’t completely cover, it was good enough for government work.
After your eggies dry, yank the hanging loops out of the ends.  You might end up taking a little bit of the paint and styrofoam with the loop.  You can touch up the paint if you would like, but nobody is going to be looking THAT closely.  Unless you have some really weird friends.  Which I do.
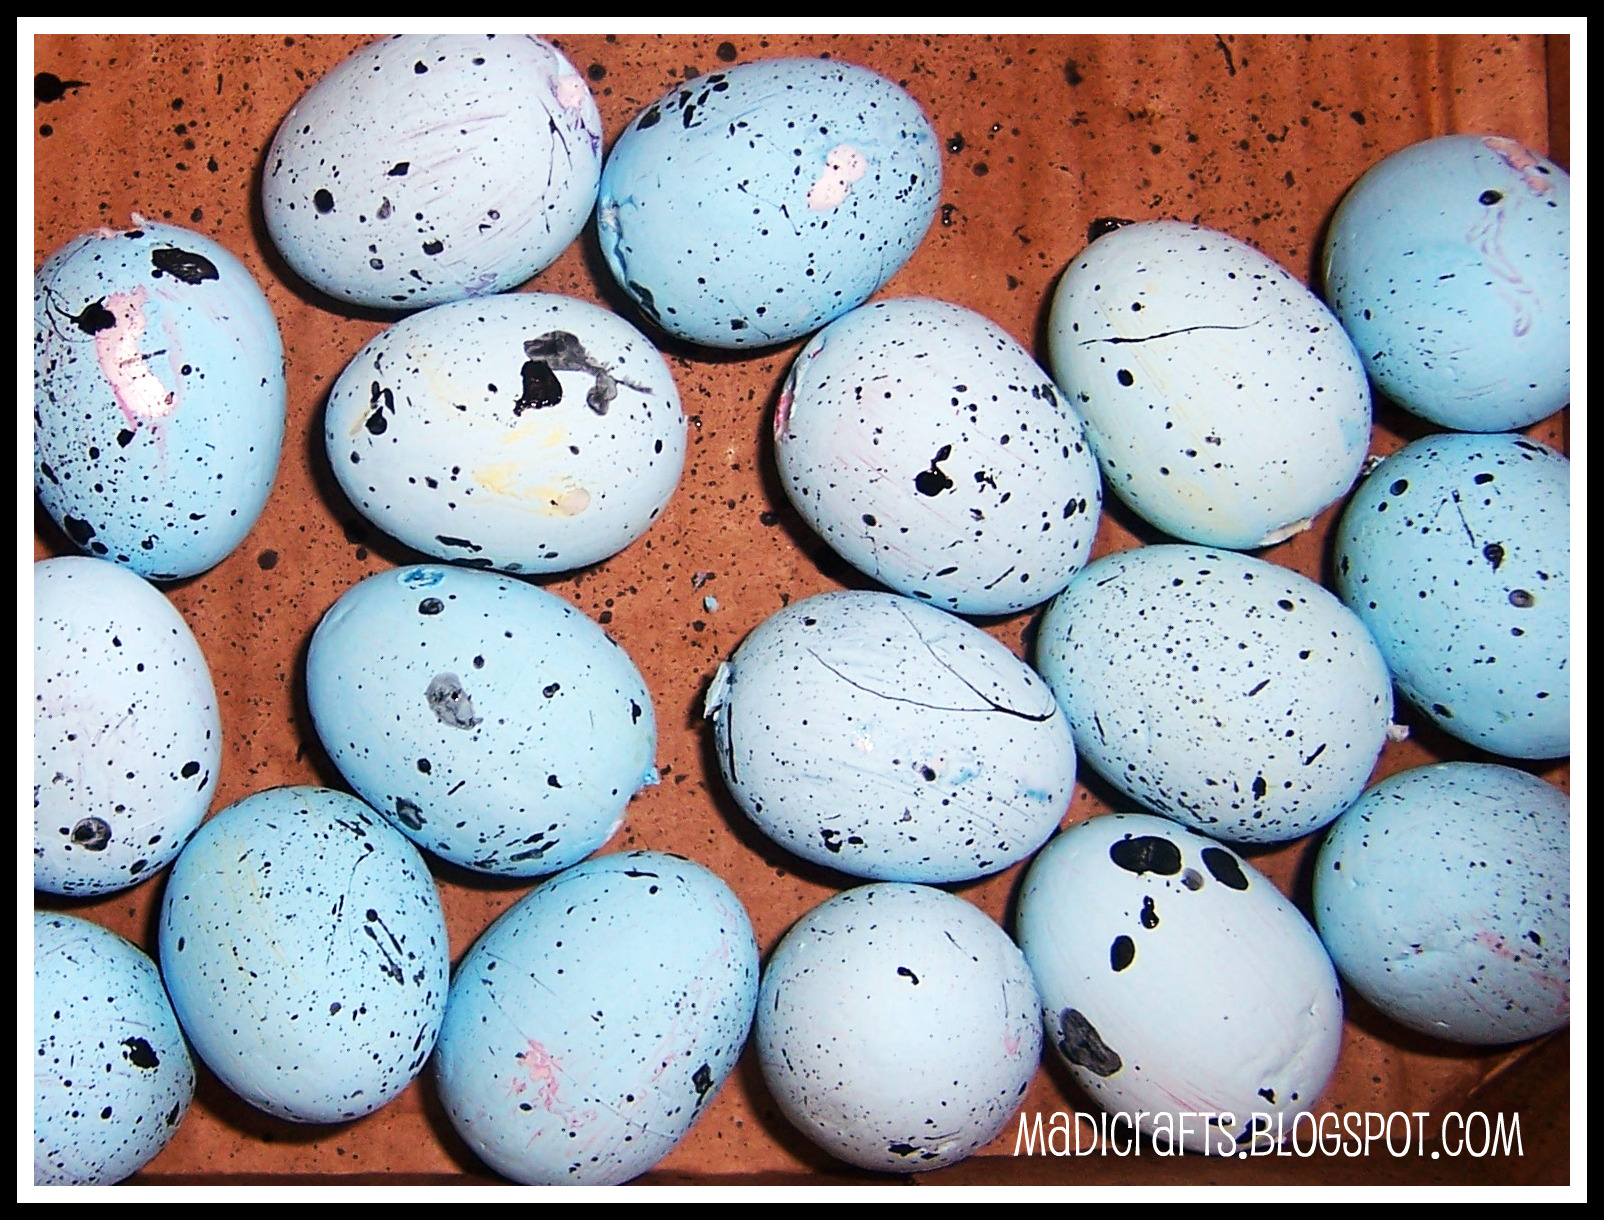
Put the eggs in a cardboard box or on a well-covered surface.  Things are about to get messy.  Dip a bristled paintbrush or an old toothbrush in black or brown craft paint.  If the paint is thick, you will probably need to thin it out, I found.  Flick the paint off the brush and onto the eggs with your pointer finger.  SPLAT!  Kids will love this part.  Keep splattering and rolling the eggs around until each egg has splatters all over it, like so:
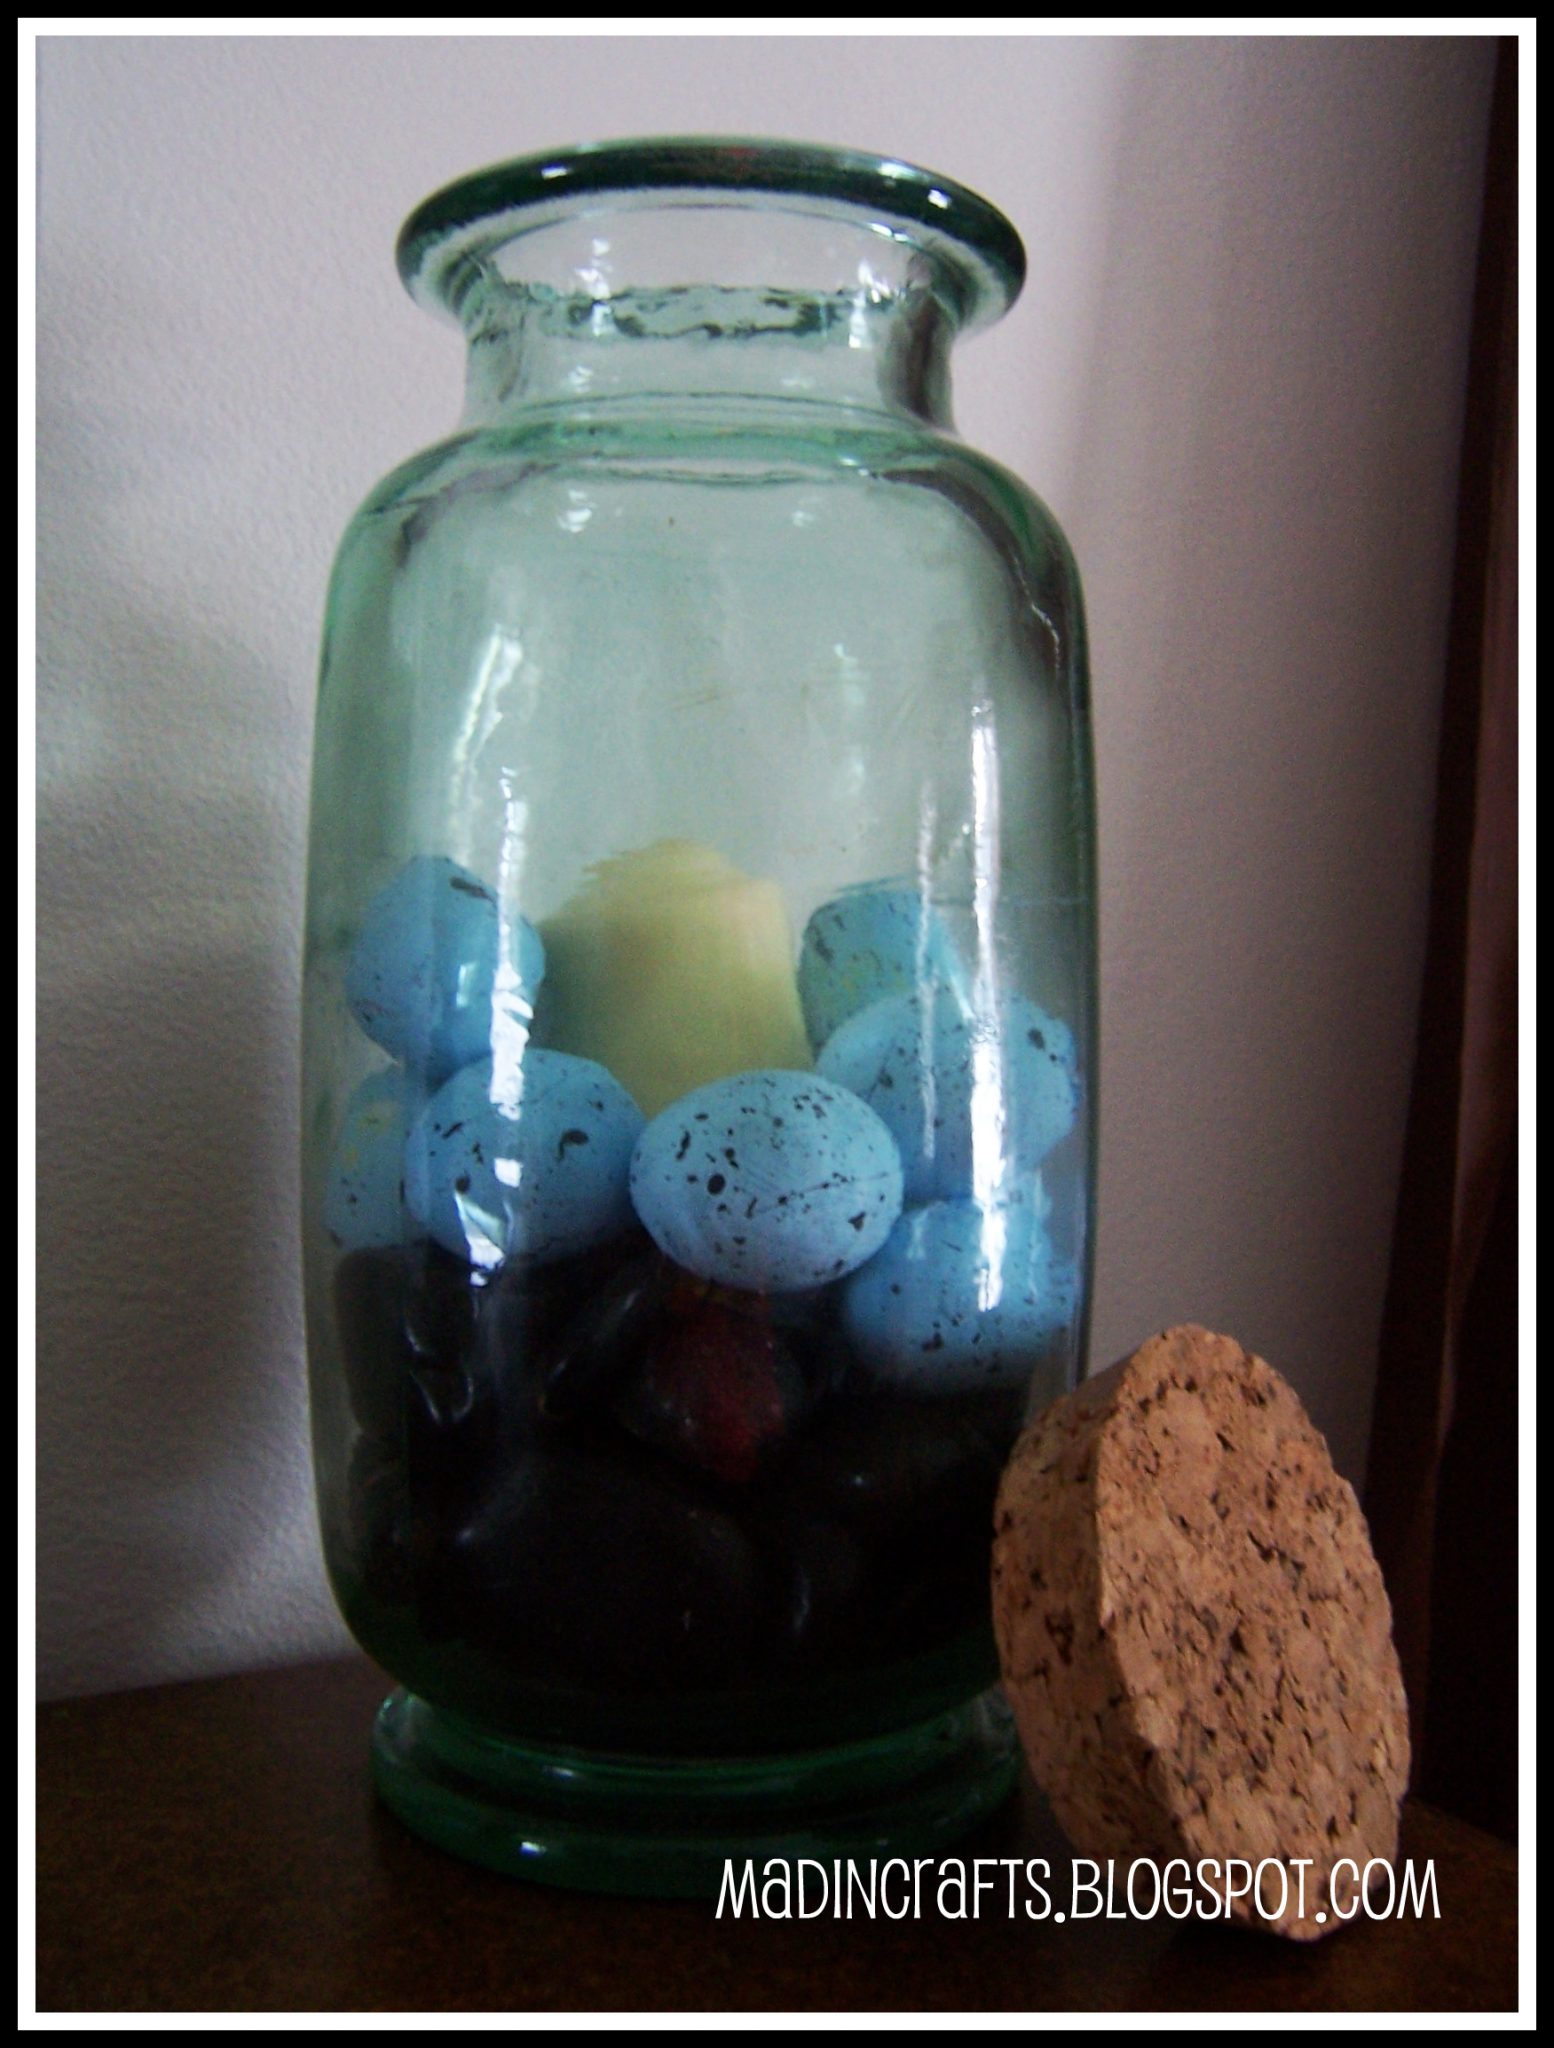
Ta Dah!  You just made a rip-off of PB’s Decorative Speckled Egg Vase Filler which is listed as $14 for 12 eggs.  That’s right, friends, you just saved yourself $26 if you made a double-batch.  Plop them in a pretty vase, bowl or apothecary jar and your home is looking more Spring-y already.
Come and check out the rest of my Dollar Barn series (with a special Ballard-Derived feature) this week on Mad in Crafts!  And, not to beg, but comments totally make my day.  :P

Not Just Valentine Napkin Rings

This idea from tatertots and jello is genius!

Burlap Napkin Rings Tutorial {Dollar Store Project}

I have so many Valentine ideas I wanted to do -- but  I'm running out of time! Here's one I made today. But, these napkin rings don't have to be just for Valentines Day - you can use them all year. 
I bought the napkin rings at the Dollar Store. Yep, I have been wandering around in there again! Four napkin rings for a dollar -- pretty sweet deal. I had wanted to make this for awhile and thought I would go to home depot and get some sprinkler PVC pipe and cut it into sections to make the rings, but then I saw them at the the Dollar Tree. Saved me some time and effort!

If you want to make these, here is what I did.

Supplies:

Burlap -- eight inches wide by 13.5  inches long section to make 6 napkin rings
Hot glue gun and glue sticks (low temp is great or you might burn your fingers like I did)
Napkin rings (Dollar Tree)
Jewelry embellishments (I got mine from Michaels on sale -- 2 for $1.99 plus 30% off)
Ribbon ( I used pale pink organiza, but you can use any color you like)

  1. Cut your burlap into strips 2 1/4 inches wide by 8 inches in length. Cut as many as napkin rings you want to make.


  2. Put your ring in the middle of the burlap strip. Put a dot of hot glue in the center at the bottom of the ring. Hold the material tight around the outside of the ring and bring the edges together where the glue dot is. Press down tightly. If using hot glue, not low temp, let the glue sit for a few seconds before bringing the material around on top of it. It is very easy to burn your fingers. It is good to let the glue cool off just a bit first. You can also use the end of a Popsicle stick or end of a pencil to hold the glue while it is hot and then smooth it down with your fingers once it is almost cool.


  3. Repeat step 2 all the way around the napkin ring until you are back at the beginning.
  4. When you are back to the seam again, overlap the burlap so that it goes over the first seam and cut off any excess. Run a line of glue under the outside seam of the burlap and press down to close.


  5. Repeat with all of the napkin rings.
  6. Measure your ribbon. Cut the ribbon to the length of the circumference of the napkin ring.


  7. Once your burlap is attached, put a dot of hot glue on the seam of the napkin ring. Put the edge of the ribbon on the hot glue, run the ribbon around the napkin ring until you reach the hot glue again. Press the end of the ribbon into the hot glue. If the glue has cooled, put another dot of hot glue on top of the other end and press down.


  8. Once the ribbon is attached, attach your decorative jewelry pieces. Mine had loops on four sides that are used if you using them for jewelry. I cut the loops off using pliers. I used Gorilla Glue to attach the jewelry piece to the napkin ring. I put a small dot of glue at the top and bottom of the jewelry piece and put it on the top of the napkin ring - so the seam is opposite on the back. I held it down for a couple of minutes until it was tacky and then let it sit so the jewelry piece was facing up until it was completely dried - about 2 hours. 

I'm excited to use them on Valentine's Day, but I think I will use them throughout the year too!