Too Many Good Things Out There Not To Share Them With You!

Showing posts with label recipe. Show all posts

Friday, February 26, 2010

Ice Cream Cone Cakes

This is another secret blog I love. I get good ideas for activities for my class geared around children's literature. Instilling a love for learning and reading is soooooo very important and super fun might I add. I can't wait to get more ideas from her in the future!

Ice Cream Cones w/o the Mess!


I had E's Valentines Day party today, and it was a huge success! The kids loved their pony bead heart necklaces. I was afraid the craft would be too hard for the kids, but they did great and there were enough moms there to help.

(Isn't my friend's little girl adorable? She and her twin sister are always so well-dressed. :)

The book My Heart is Like a Zoo was also a huge hit. Besides the book and the craft, I was responsible for dessert. At first I planned on keeping it simple with heart jello jigglers. My mom always made these for my class and I have fond memories of "finger jello".

IMG_4305

But then my sister Beth @ The Stories of A to Z twittered (tweeted?) a picture of these Valentines Faux Ice Cream Cones and I fell in love. She hadn't blogged about it yet, so I googled for a recipe and found one at Easy Cake Ideas. It looked easy, so I decided to give it a try. Here's what I did:

The Meringue Tops (do this the night before if possible)

IMG_4285

Ingredients:
  • 3 large egg whites
  • ¼ teaspoon cream of tartar (mine turned out fine without)
  • ¾ cup granulated sugar
  • Piping bag or gallon size Ziploc bag
1. Preheat oven to 200° F

2. In a large bowl beat the egg whites until foamy. Make sure your bowl and mixer are very clean. Any grease will ruin the meringue.

3. Add the cream of tartar and continue beating until soft peaks form.

4. Add the sugar a little at a time and continue beating until the mixture holds stiff peaks when the whisk is lifted from the bowl.

5. Line a cookie sheet with parchment paper or tin foil (not wax paper).

6. Using a piping bag without a tip or a gallon size Ziploc with a 1” hole snipped in the corner, pipe a meringue 'ice cream' swirl in roughly the same diameter as the opening of the ice cream cone.

7. Top each with sprinkles.

8. Bake for 1 ½ hours or until the meringue is dried out and crisp to the touch.

9. Crack the oven door and leave to finish drying out overnight.

The Cake Cones

IMG_4287

1. Using a cake mix, follow the directions up to pouring into the pans.

2. Line up the ice-cream cones on a cookie sheet.

3. Spoon the cake batter into the cones, filling only to the line where the neck of the cone widens out.

4. Bake at 350° F for about 22-25 minutes, until a cake tester comes out clean.

5. Cool completely.

Assemble!

IMG_4290

Spread icing (I used store-bought) on top of the cake cone and then top off with one of the meringue cookies.

IMG_4298

Now they're all ready to pass out to a class of sweethearts! These ended up being a huge hit with E's classmates. They got a kick out of the pretend ice cream, and I heard two little boys exclaim "it's not messy!"

The whole process took most of the afternoon yesterday and much of the morning, so I don't plan on doing this again anytime soon, but I am proud with the way they turned out. If you want a simpler solution, my sister used marshmallows inside the cones instead of cake and added M&Ms to the meringue.

I read Amilia Badilia's First Valentine, Valentine Mice, and Mouse's First Valentine for my class on our special party day just in case you wanted to know.

Wednesday, February 24, 2010

Batch Cooking from Simple Bites

Back to the Basics: Batch Cooking

Post image for Back to the Basics: Batch Cooking
Photo by Martin Kingsley
Quite a few of you mentioned that you’d like the topic of freezer meals and batch cooking covered in our Back to the Basics series. I’m definitely not an expert in this field, but it’s something I want to incorporate more in my own home management, so this is a refresher post for me as well.
Cooking in advance has the serious advantage of saving time and money. You’ll waste less food (especially the perishables), and you’ll save money by doubling up your efforts on the spoils brought home from the store.
It’s also healthier, because you won’t need to buy convenience foods that are chock full of MSG, preservatives, sodium, and other unpronounceable chemicals.
There are a few methods of batch cooking, but essentially, it involves cooking a lot of food in advance. You can cook enough food to warrant freezing and stockpiling, and you can prepare scratch ingredients, helping you to cook without the fake ingredients found in so many store-bought items.
Here are a few tips for the different methods of cooking ahead of time.

Freezer Meals

Freezer meals are entire meals prepped in advance, and then frozen for later use. They can ether be completely cooked, so that all they need is thawing and reheating, or you can prepare most of the steps in advance, so that all that’s left is cooking the meal.

Advantages:

This is a great time saver. You can stockpile loads of meals for future use, such as when you’re expecting a newborn in your life. Or you can simply have a few meals on hand, so that when life is a bit busy, all you need to do is shop your freezer.

Disadvantage:

You need the space. If you want to do freezer meals hard-core, you might want to check your local Craigslist to find a used deep freezer for your garage. I have a simple second freezer in the kitchen (it’s the size of a compact fridge that’s popular in college dorms). It provides some extra space, but not a ton.

Helpful Tools:

Plenty of freezable dishes, such as those foil casserole dishes you can find in your grocery store. I prefer large resealable plastic bags because they take up less space. Vacuum sealers are great, too, though I don’t have one.

Good Freezer Meal Recipes

Chicken Nuggets
Fannie Farmer’s Classic Baked Macaroni and Cheese
Beef Stew
Chicken Tetrazzini with Caramelized Onions (make the alfredo sauce from scratch – it’s very easy)
End of Summer Vegetable & Fresh Herb Casserole
One Skillet Lasagna
Chicken Enchiladas
Spinach Black Bean Lasagna
Ground Beef and Tomato Manicotti
Chicken and Wild Rice Soup
You can also search the freezable meals at My Recipes or the make ahead recipes at Whole Foods.

Once A Month Cooking

Some families cook all their meals for the month in one day. I haven’t personally done this, but I hear it works well when you plan in advance and you have extra hands to help.
You can create a two-week menu plan, then buy all your ingredients on one shopping day. Get your perishables and produce at the farmer’s market, and everything else at the grocery store.
Make sure you double all the amounts for each recipe, so that you have enough for the month. You could even quadruple the recipes and have plenty for lunch.
Then you clear an entire day early in the month, and cook, cook, cook. It’s a tough day, but then you’re done for the month! Freeze the meals, label and date them well, and all you have to do is thaw, reheat, and serve.

Cooking & Freezing Staples from Scratch


Photo by thebittenword.com

Even if you don’t like the idea of freezing entire meals in advance, you can still batch cook and freeze staple ingredients.

• Once or twice a month, roast a whole chicken, then cube the meat and store it in half cup or whole cup quantities in resealable bags. Label the quantity and date — you might think you’ll remember, but believe me, you won’t.
• Now, you’ve also got plenty of chicken broth to freeze. Also store this in whole cup quantities, and label it well.
• I also like to match batches of homemade cream of chicken soup, and freeze for recipes later. The stuff in boxes and cans are chock full of fake ingredients and sodium.
• Brown and drain ground beef the day you buy it at the market, and you can also store this by the cup for freezing. This way, you’ll also use less meat per meal, because it’ll be an ingredient instead of the main feature.
• I also like to throw dried pinto beans into the Crock Pot to make a simple side dish that will last us about two weeks. You can mash them into refried beans, too.
• We’ll get to canning later, which will cover lots of veggies and sauces. But you can also make basic marinara sauce, pizza sauce, and salsa in bulk, and freeze them for later. Jump on these things now, while tomatoes are abundant, fresh, in season, and cheap!
It can feel overwhelming if you try to jump on all these ideas at once, so just pick one or two, and gradually add more freezer meals to your agenda. For me, I’ll be freezing my chicken ingredients, ground beef, and a few meals for the next few months.

Sunday, February 14, 2010

Mmmmmm Hot chocolate on a stick!

From Giverslog Blog.

I kept this recipe as bare bones as possible in hopes you’d play with different flavors, molds, and sticks, sort of like an open source recipe. But when you do blog, would you link back to me here? (Like this and this kind review, thank you!) I will so appreciate it. It’s taken a few years of researching and practicing with chocolate (certainly not an unpleasant thing) and some days of a very messy kitchen (but a happy family) to provide you with this recipe and with good, solid advice on smooth, melty chocolate.
gourmet hot chocolate on a stick gift
Oh how I love when the weather turns cold enough for hot chocolate. Something about a good cup of hot chocolate makes the world feel like a gentler place.
This idea is something I’ve been wanting to try for a couple winters now. I’m glad I finally took the time to puzzle it through and do a little taste testing, because it turned out to be so simple, and the results so delightful. Stir one of these sticks into a cup of steaming milk or cream and in two minutes  you will have transformed it into a cup of rich hot chocolate, the blessed stuff. I can’t help feel that the act of stirring adds to the experience, soothing you over while building up the anticipation for that first sip.
hot chocolate on a stick gift
First things first: what chocolate to buy (see a whole post dedicated to this here)
The trick to making the best hot chocolate on a stick is using good, serious chocolate that melts easily. A chocolate with a high percentage of cocoa butter will do that. More cocoa butter means quicker melting. A bag of every-day chocolate chips won’t melt as fast. You can also find fake chocolate (like a bag of Wilton’s candy melts), which uses vegetable fats instead of cocoa butter. It will melt well, but the resulting cup of hot chocolate won’t be as transcendent. And we’re going for transcendent here. The candy melts are great for coating the outside if you like, because they stay pretty and shiny even if you don’t melt them just right.
If you really want to go gourmet,  use couverture (made for dipping truffles, which has up to 39% cocoa butter, such as this), and don’t just melt your chocolate, temper it. But any pure chocolate will do. Try a bag of real-chocolate wafers made for a chocolate fountain or for fondu or a good baking chocolate bar (make sure it’s sweetened, not unsweetened). You can often go to a grocery store and find pieces of giant slabs, which is what confectioners use. Following are some good brands: Callebaut (which is what I buy at the Winco bulk section), Ghirardelli, Dagoba, Michel Cluizel, El Rey, Valrhona, Scharffen Berger, Lindt, and Guittard.
chocolate wafers meltable
Word of warning: no water!
There is one thing you need to know before working with chocolate if you don’t already: never let water or alcohol touch it. Not a drop. You can be stirring a potful of smooth, decadent melted chocolate, then get one drop of water in it and the whole thing will get grainy and seize up. It’s a sad experience. (If this happens to you, try Tiffany’s tip below. Or use the chocolate for a recipe like brownies or ganache that uses chocolate and liquids).
So then, if you’re planning to introduce vanilla, use a vanilla bean or vanilla paste, not vanilla extract. If you want to add food coloring, use a gel or powdered form, not the liquid stuff.
chocolate homemade candy
Hot Chocolate on a Stick
Yield: 10 cubes of hot chocolate (ice-cube-tray size)
(use 1 oz. hot chocolate on a stick per every 1 cup milk or cream)
Equipment:
Ziplock bags or piping bags
A double boiler or pan with a glass bowl that can sit over the simmering water
Some kind of chocolate mold, ice trays work great
Stir sticks or a bag of wooden craft sticks like I used (like these, available at any craft store)
Ingredients:
8 oz. chocolate (see note above), bittersweet, semisweet, milk, and white chocolate all work
1/4 cup cocoa, sifted
1/2 cup confectioner’s sugar, sifted
pinch of salt
6 cups milk and 2 cups heavy cream if you plan to enjoy these right away
Method
(read a whole post about melting chocolate, including how to melt in the microwave, here)

  1. If your chocolate is in a block, chop it into even-sized meltable pieces. Simmer a couple inches of water in a pan, then turn down the heat so the water is below a simmer. I like to remove the pan from the heat, but if you keep it on, keep that water below a simmer. Place glass or stainless steel bowl over the top to make a double boiler. If the bowl touches the water it’s alright, as long as your water is mildly warm, not hot. Dump chocolate into the clean, dry bowl and stir as the chocolate melts. (If you are patient and let those chunks melt slowly, keeping them from getting over 90 degrees F or 88 degrees F for milk and white chocolate, the chocolate will stay “in temper” and will still be nice and pretty when it cools.)
  2. Once the chocolate is 2/3 melted, with just some pieces of the chocolate unmelted, remove the bowl from the pan, dry the bottom with a towel and continue stirring until chocolate is fully melted. This is just one more step to keep the chocolate from getting too hot.
  3. Add cocoa, sugar, and salt and continue to stir until combined. The chocolate will be thicker, as thick as frosting, but stir on. If it looks and feels grainy it’s possible you’ve accidentally gotten a drop of water in the mixture. If it has gotten water in it and has seized up, it will still taste alright, it just won’t be as pretty or smooth or melt quite as fast.
  4. Scoop chocolate into a ziplock bag and clip off the corner.
  5. Pipe the chocolate into your chocolate mold, tapping the mold on the counter to make sure all the chocolate settles into the mold. Add a stir stick and you’re done. The stir stick should stay upright without any trouble. If the chocolate bursts through the bag in places you don’t want it to, just put the whole thing in another bag. If the chocolate starts to get too thick to squeeze, just put the whole thing in a microwave-safe bowl and microwave for 30 seconds or so at half power.
  6. Let the chocolate cool either at room temperature or in the fridge if you’re in a hurry. I find the chocolate pops out of the mold nicely if it’s been in the fridge. It’s okay to cool chocolate in the fridge, just don’t store it there, because chocolate soaks up the odors of other foods pretty quickly.
  7. If you don’t like the look of the chocolate once it is removed from the mold, you can dip the cubes into a new batch of plain melted chocolate for a shinier finish (again, try to keep chocolate from heating over 90 degrees, or use candy melts, which don’t need to be in temper, they will stay shiny and pretty even if you go above 90 degrees). This also lets you add sprinkles or crushed candy or just lets you dip in fun patterns. I like dipping at an angle into a different color of chocolate.
  8. In order to enjoy these, heat up any combo of milk, water, half and half, or cream. I like 6 cups milk with 2 cups heavy cream. One ounce of chocolate on a stick should be melted into one cup milk or cream. So a standard ice cube-tray block, which is 3/4 an ounce, should be melted into a mug with 3/4 cup milk or cream in it.
Troubleshooting: A few of you have had trouble with your chocolate seizing. Tiffany provided this great note  to help out (thanks, Tiffany!), “if the chocolate begins to seize (since for some reason, both of my batches seized, I’m thinking it’s the humidity in the air where I am) you do not have to throw it out. Just put the bowl back over the hot water and add a little bit of vegetable oil (I used somewhere between a tsp and a tbsp) after stirring over a little heat, the chocolate will get smooth again. Also good to note, chocolate can seize if you add any cold ingredients.”
How to store it: Dark chocolate will keep in an airtight container for up to a year, milk and white chocolate for several months. Remember, don’t keep it in the fridge because it is really good at absorbing odors.
hot chocolate on a stick3
cinnamon hot chocolate
Variations: Try adding a pinch of cardamom, anise, allspice, nutmeg, cinnamon, malted milk powder, or cayenne pepper, depending on your mood. We tried adding a little extra punch by lining the outside with red hots. Very fun. You can also leave out the cocoa and sugar all together and replace it with 8 servings of your favorite packaged hot cocoa. Have you ever had so much fun? I love playing with chocolate.
mold
As you can see, we played around with a few different molds, like this water bottle ice cube mold from IKEA. The classic ice cube mold was my favorite though. It works best for submersing the entire block of meltable chocolate in a standard mug.
UPDATE: Love Prince Pi’s suggestion of molding these in shot glasses. Also love how the Kitchn (yea!! they tried my recipe!!) made do with a single pan. TinaMarie also made the great suggestion of using small Dixie cups. And finally, check out this beautiful version Sprinkebakes made using a chocolate transfer sheet and birch spoons. You will love it.
hot chocolate on a stick 2
This was fun too. My son thought the resulting blocks looked like the shape of strawberries.

Wednesday, January 6, 2010

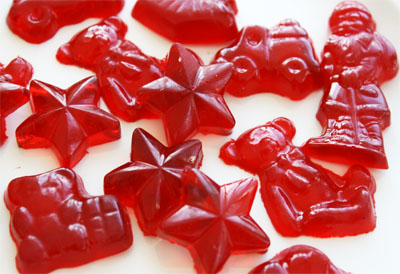
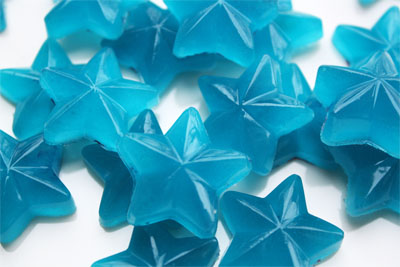
OMG Gummies

OK, I have to try these out so I thought you needed to see them first. I found them over at Skip to My Lou. They are sooooo cute. I'll have to make a few batches fr our upcoming bear picnic in class for a special snack. I think you can find these molds at the Dollar Tree right now so don't be shy. I have never used the molds before so maybe you guys can comment on their ummmmm cooperation. But I will be giving these a try like I said and I already have most of this stuff on hand. I'm sure the candy companies are fuming right now as we are plotting to never again pay their prices for gummy candies. Hooray! So here's how:

Homemade Gummi Candy


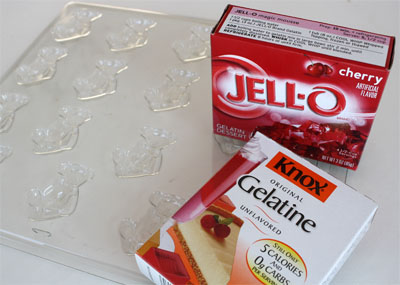
All we needed was 1 -3 oz box of flavored gelatin and 2 - 1/4 oz  packages of unflavored gelatin, water and candy molds. (we used two candy molds)

Place 1/3 cup water in a small sauce pan. Sprinkle the Jello and  unflavored gelatin over the water. Let sit 5 - 10 minutes. (If you like chewier gummi candy add in another packet of unflavored gelatin.)
Place sauce pan over medium heat and stir until gelatin is dissolved, about 2-5 minutes. When mixture is liquid and all gelatin has dissolved, remove from heat.  Let cool a minute and then pour into a container that is easy to pour from.  I use a small ceramic creamer pitcher.

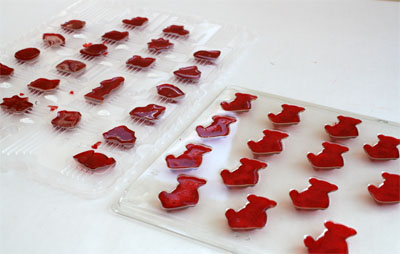
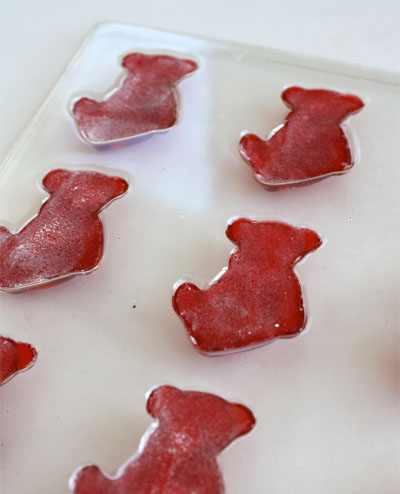
Fill molds. If you save the inside of the advent calendar for  projects like do, it works perfect! The sheet of star molds worked a bit better than the bears because they are a bit deeper. However, I must say we were just needing an activity so our standards were pretty low--- we thought they all turned out great!

Allow to cool completely, about 20 minutes. They may be placed in a refrigerator for about 10 minutes if the kids are eager.
Once cool, the backs can be lightly dusted with corn starch, if desired.

Peel the gummi candy out of the molds. Don't be shy, you won't hurt them when peeling them from the molds. No need to oil the molds!

Enjoy!

Make homemade stickers with the unused unflavored gelatin packets.

Notes: My son felt the blue ones weren't flavorful enough. Next time we will try 2 boxes Jello, 3 packages of unflavored gelatin and 1/2 cup water.

Monday, November 16, 2009

Best Recipe Website Ever, Really

To take a small break from crafting I wanted to share with you all a great recipe website that I swear by. It's called All Recipes.
I know there are fifty thousand different recipe websites and they are all good in some way but here are a few reasons why I really love this site and use it often.

1. It's really easy to navigate through the website. You can find anything with a few short clicks.

2. You can register and the really easy tool bar next to each recipe is a tool bar that you can customize the recipe, add the ingredients to a shopping list, print, share, and add to your virtual recipe box.


3. Probably my favorite is how you can change the serving size and they will automatically adjust the amounts of each ingredient. Pretty fantastic if you ask me!

4. There are reviews from real people and lots of people. The people in the reviews tell you how they changed the recipe to make it different and maybe better.

5. They have fun holiday tabs with loads of fun recipes and such.

Those are just the top five reasons. There are lots more features and it's mucho fun. Sometimes I get a little lost in everything but I realize what I can actually make in a 24-hour period. I get a bit carried away at times, can you tell? So have fun looking around.

Thursday, October 29, 2009

Pumpkins, Pumpkins, And More Pumpins!

I must admit I have little confession. I really, really like pumpkins. I love the way they look sitting outside your front door. I love the way they look sitting (currently) on my kitchen island just waiting to be used for some yummy recipe. I love the way they look in books I read my little people. I especially love they look all in a sweet row at the pumpkin patch. There's something about pumpkins all in a row that makes my little organizing heart skip a beat. All right, all right, you get the idea. I found a happy little site with many, many recipes with your favorite little orange food, and mine, --the pumpkin.  I have not tried any of these recipes yet but some look pretty good. Feel free to take a gander. And let me know if you make anything and it's yummy.

Amy's Finer Things