Too Many Good Things Out There Not To Share Them With You!

Showing posts with label gifts. Show all posts

Saturday, March 6, 2010

Hello Neighbor, What Do You Say? It's Going To Be A Happy Day!

Hey friends, this one is a free tag and quick how to for giving your neighbors a little gift. We know our immediate neighbors pretty well but a resolution for the year is to get to know all the neighbors on our block so here's fun little tag and idea to do just that. You really don't need some snazzy tag to go out and just talk to your neighbors. I am well aware of this but if you are going to make the effort to go over you might as well make them something yummy to let them know you're just glad they're there. Anyway here's the sweet little stuff from joy ever after blog. Enjoy.

love your neighbor…

…by giving them muffins!
//UPDATE The muffin boxes were purchased from The Container Store. Thanks! //
Last weekend I put together this little project and delivered it to my neighbors. These muffins are my absolute favorite, lemon & blueberries. I use any excuse to make them whenever possible.


For anyone interested in making a little treat for your neighbor, I am including a download of the cards I made. Nothing is more fun than giving a bribe to get on your neighbor's good side.

To get the downloads click here please and scroll tot he bottom and click on this picture. 

Friday, March 5, 2010

Stencil With Freezer Paper

I have been thinking of fun ways to use my cricut machine and one way is as a stencil. Seems easy enough right? Well here is something much less expensive than vinal paper which runs around $7.99 in craft stores. So I will be trying this bad boy out soon.

Stencil With Freezer PaperOne of the projects at this Friday's Chicago Craft Social will be freezer paper stenciling. I'm helping lead this table, so I needed to give it a test drive and make up some samples. You know how a project usually has four tedious steps you tolerate and one step that's super fun? I think this is one of the few where all of the steps are fun. Or maybe that's just me. I'm now in the grips of stencil mania. I'm stenciling everything.

To stencil your own stuff:
Buy a roll of freezer paper (approx. $3.99) or beg a piece from the guy in the meat department at your grocery store. Draw your design on it and cut it out with an X-acto knife. Then iron the paper, shiny side down, onto the fabric you're going to stencil. Iron another sheet to the back of the fabric to keep the paint from soaking through. You can use the iron setting that corresponds to the fabric you're stenciling.

With a foam brush, stenciling brush, kitchen sponge, or other paint brush, apply fabric paint to the cut-away areas. I used Jacquard brand textile paint from the local art store.

Let the paint dry (use a hairdryer if you're the impatient type, like me.) Peel the freezer paper off. Set the paint by following the directions on the jar — usually ironing will set it. Ta da.

Tuesday, March 2, 2010

Taffy........That YOU Made. Oh yes you can!

OK. Don't think me crazy and just read the post. It's super cute and looks relatively easy to do so read on before you throw it out the window! I would try this with my kids only I think, not my preschoolers from school. It would be like a bad sesame street episode. Read on! I think I'll make this for my sister. She adores taffy and she would be oober impressed by the home made factor. These would be great too as a favor at a birthday party.

Skip to My Lou Blog
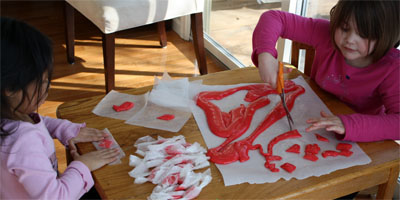
Welcome to our Sweat Sweet Shoppe! If you are alarmed by red dye, excessive amounts of sugar and under age workers turn away now!

If not, stick around and see how we made loads of homemade taffy!

Here's our recipe

Homemade Taffy

2 1/2 cups white sugar
3 tablespoons cornstarch
1 cup light corn syrup
1 1/3 cups water
2 tablespoons butter (plus lots extra to butter hands)
1 teaspoon salt
1 - .21oz (6g) package unsweetened, fruit-flavored drink mix (like Kool-Aid) (we used cherry)
1/2 teaspoon vanilla
Butter large jelly roll pan or a cookie sheet with sides.
In a medium saucepan, stir together the sugar and cornstarch.  Add corn syrup, water, butter and salt and stir well until butter is melted. Bring to a boil over medium heat and stop stirring. Cook mixture until candy thermometer read 250 degrees F (120 degrees C). This takes some time to get it to 250 degrees. Once it approaches 250 degrees watch very closely because it cooks quickly at the end.  Immediately remove from heat. Carefully stir in vanilla and drink mix. Stir well. We should have stirred ours more-- notice some bits of drink mix (dark spots) on our taffy. Pour mixture onto buttered baking pan. Allow to cool enough to handle, about 10 minutes.

Directions:

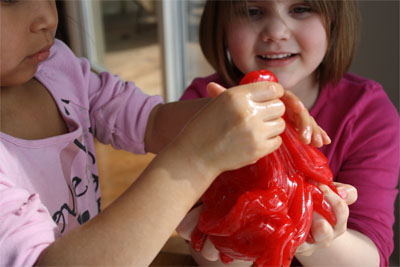
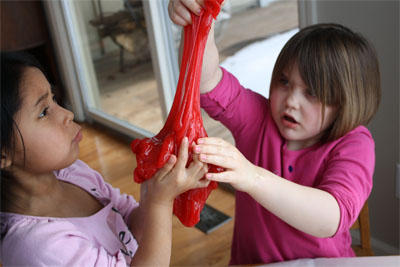
Once the taffy has cooled enough to handle, butter hands and begin pulling. (It starts kind of translucent)

Then pull...and pull...butter hands again...pull...

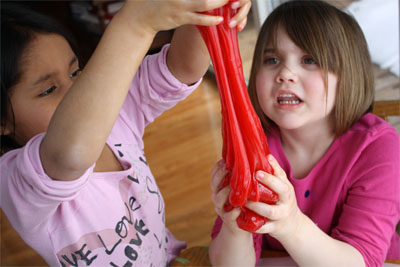
and stretch...pull...more hand buttering...pull...

It will become more opaque and lighten in color depending on the attention span of your workers! This takes about 10-15 minutes of pulling.

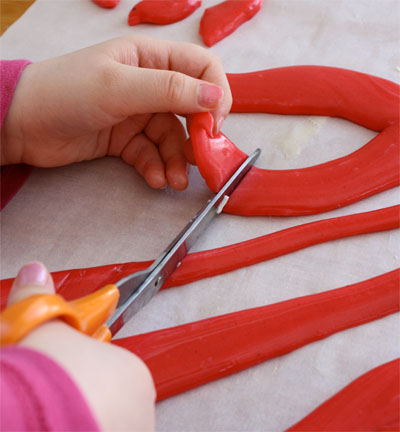
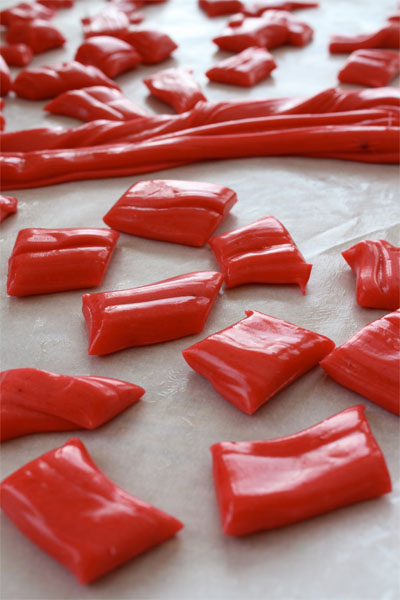
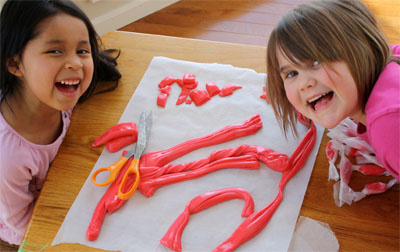
Pull into long ropes and cut with buttered scissors.

and cut!

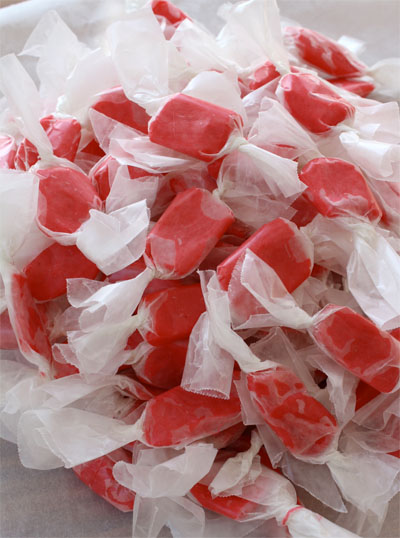
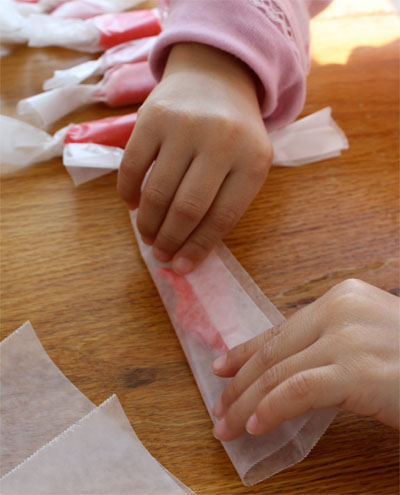
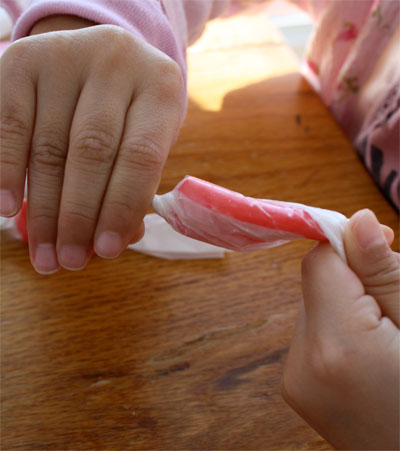
Wrap pieces of taffy in pieces of waxed paper

and give it a good twist on each end.

Finished!

Sweet!!

Monday, February 22, 2010

Who Else Needs A Spa Day?

Natural Beauties
Spa-inspired presents, including these handmade lip balms, can be created from basic kitchen ingredients and craft materials.


Getting Started: Essential OilsTo scent homemade bath and beauty items, you'll need essential oils, available at health-food shops and online.
There are dozens of scents on the market, but we've listed some of our favorites. You might also come across fragrance oils.
Unlike essential oils, which are extracts of plants and fruits, fragrance oils may be made with synthetic compounds. That said, either type of oil is suitable for these projects. Use scents alone or in combinations: If mixing scents, add the oil with the less-intense scent first, followed by the stronger kind, one drop at a time.


EucalyptusStrong intensity. A powerful, clear aroma that pairs nicely with lemon. Use sparingly.
GeraniumStrong intensity. A sweet floral scent that mixes well with peppermint or lemon.
Grapefruit, Lemon, or TangerineMedium intensity. Citrus oils can be used individually, but because they're so lively and adaptable, they lend themselves naturally to combinations.
PeppermintStrong intensity. Refreshing on its own but also a fine partner for many other oils. A little goes a long way.
RosemaryMedium to strong intensity. Herbal, woodsy aroma. Especially good with lemon.
Star AniseMedium intensity. Warm, almost wintry fragrance. Excellent with tangerine.

Carrier OilsTwo projects, the lip balm and the body scrub, call for a carrier oil. Chances are, you already have one of these oils in your kitchen. Their job is not to add scent but to create a smooth texture and also help distribute the essential oil.
Grapeseed OilLightweight, easily absorbed, and virtually odorless.
Olive OilA natural moisturizer. Use the lightest grades so that the scent wont mask that of the essential oil.
Sunflower OilOdorless and inexpensive.
Vitamin E OilHas a soft, light body. It can be expensive, so use it in small quantities in combination with another carrier oil.

Projects

Body ScrubGet the How-To
Web-Exclusive Clip-Art Labels:
Blank Body Scrub Labels 1
Blank Body Scrub Labels 2
Salt Scrub Labels 1
Salt Scrub Labels 2
Sugar Scrub Labels 1
Sugar Scrub Labels 2

Lip BalmsGet the How-To
Web-Exclusive Clip-Art Labels:
Small Rectangular Lip Balms 1
Small Rectangular Lip Balms 2
Small Round Lip Balms 1
Small Round Lip Balms 2
Large Rectangular Lip Balms 1
Large Rectangular Lip Balms 2
Large Rectangular Lip Balms Blank 1
Large Rectangular Lip Balms Blank 2
Large Round Lip Balms 1
Large Round Lip Balms 2
Lip Balm Tubes

Bath SnowballsGet the How-To

Bath FizziesGet the How-To

Got all the fun from Martha Stewart's Site.

Friday, February 19, 2010

If You Didn't Get Enough

So here is another one I thought I would show you guys and I'm convinced now I need to make these. I'm heading to the dollar tree first thing to see if they have any of these sweet trays for real!

Dollar Store Serving Tray Tutorial

Why am I so fascinated with the Dollar Store? It's truly amazing to me that everything in there is just a buck. I get a little mesmerized when I'm in there... 

I picked up a couple metal pizza pans a few weeks ago, thinking that I could do something fun with them. As I was going through my kitchen cupboards the other day I discovered that I really don't have many serving trays and I thought -- why not turn one of those pizza platters into a serving tray? I was going to make a Valentine's one, but wanted to use it all year -- so made it match my kitchen. 
I thought it would be cute to add some little feet to the tray so it sits up off of the counter. I have a box of old knobs from when I switched my knobs out in my kitchen. So I grabbed a few of those. But you could probably find some at a thrift store too. I also added a couple dainty little drawer pulls (from an old dresser redo) to use as handles.

Here's what I did:

  • I flipped the pizza pan over and measured where I wanted to put the feet. I measured the space between each foot as well as the distance diagonally across the sheet. They all ended up being 6 inches. Then I marked the spot with a black sharpie.

  • Then I picked out 4 different black and white papers to use for the projects. I cut 4 inch strips of paper. I had to cut the paper diagonally in my paper cutter so that the length would be long enough to cover the pizza pan and go over the sides.

  • Then I Mod Podged the paper onto the pan. I started at one side. I laid the first sheet of paper over the side of the pan to see where I needed to place it. I made a little mark with my sharpie on the edge of the paper. I trimmed the edges of the paper so that they mimicked the edges of the pan - -leaving about an inch longer than the edge of the pan. I made little cuts at the edges of the sheet so that when I flipped the edges under that they would lay flat.

  • Then I applied the mod podge. I put a layer on the pan itself and another layer on the back of the paper. Then I layed the sheet on the pan with the edge where the sharpie mark was. I smoothed it down using an old credit card. I used my fingers to smooth it down over the rim of the pan and around the side of the edge. (you need to put mod podge around the side to the back of the sheet). I continued pressing with my fingers over the edge of the pan and flipped the pan over to smooth down the edges on the underside.
  • Note: At this point, only put Mod Podge on the underside of the paper -- not the outside of the paper.
  • Then I applied the next strip of paper, doing the same thing.
  • Once all of the paper was applied and wrapped around to the back of the pan, I let it sit until the Mod Podge dried.
  • Once it was dried, I put a layer of Mod Podge on the top of the paper. I found that this cuts down on the bubbling. 
  • Once that layer of Mod Podge was dried, I sprayed the sheet with polyurethane spray. This will make it so you can wipe down the platter. I put 3 layers of polyurethane spray on - letting each layer dry for about 15 minutes in between coats.
  • While the polyurethane was drying, I painted my old knobs black. I applied two coats and let them dry. Once the paint was dry, I applied 2 coats of polyurethane spray and let that dry.
  • Once the polyurethane was dry -- about an hour after the last coat, I flipped the pan over and applied the black knobs to the pan. I used Gorilla Glue and it is awesome stuff! It takes about 2 hours to dry so I let it dry overnight.
  • The next morning I applied a very small amount of the same Gorilla Glue to the handles on top of the tray and let those dry for a couple of hours. And I was done!

And, for a buck --- how could I go wrong??

Thursday, February 18, 2010

Anytime Dessert Trays

LOVE this idea from tatertots and jello. I can't wait to make a bunch of these for every holiday and season. Can you see why my mother says I overdo a good thing? Now if only I had a place to store all these things. Hmmmm.......

Valentine Project: $2 TIERED Dollar Store Tray

I had so much fun making my Dollar Store tray that I decided to make a tiered Valentine-ish one too. Although I like it so much I think I will use it all Spring and maybe Summer too! It's so bright and happy looking!

If you want to make one, here are the trays I used from the Dollar Tree:

I pretty much followed the steps I used making the first tray, which are found HERE. I cut the paper into strips , but I didn't want the top and bottom trays to be too matchy-matchy, so I mixed it up a little.

And I added feet just like I did to the first tray, although I painted them off-white instead of black.

I also used a little silver candlestick that I had laying around. I was going to paint the candlestick, but I like the shine it gives the tray so I left it silver.

Also -- I wrapped a pink striped ribbon around the underneath of the top tray where you can see the paper edges. I meant to take a picture of that, but forgot. I will try to take one tomorrow and update it.
I am excited to use it on Valentine's night to put my dessert on. So fun!

Wednesday, February 17, 2010

Not Just Valentine Napkin Rings

This idea from tatertots and jello is genius!

Burlap Napkin Rings Tutorial {Dollar Store Project}

I have so many Valentine ideas I wanted to do -- but  I'm running out of time! Here's one I made today. But, these napkin rings don't have to be just for Valentines Day - you can use them all year. 
I bought the napkin rings at the Dollar Store. Yep, I have been wandering around in there again! Four napkin rings for a dollar -- pretty sweet deal. I had wanted to make this for awhile and thought I would go to home depot and get some sprinkler PVC pipe and cut it into sections to make the rings, but then I saw them at the the Dollar Tree. Saved me some time and effort!

If you want to make these, here is what I did.

Supplies:

Burlap -- eight inches wide by 13.5  inches long section to make 6 napkin rings
Hot glue gun and glue sticks (low temp is great or you might burn your fingers like I did)
Napkin rings (Dollar Tree)
Jewelry embellishments (I got mine from Michaels on sale -- 2 for $1.99 plus 30% off)
Ribbon ( I used pale pink organiza, but you can use any color you like)

  1. Cut your burlap into strips 2 1/4 inches wide by 8 inches in length. Cut as many as napkin rings you want to make.


  2. Put your ring in the middle of the burlap strip. Put a dot of hot glue in the center at the bottom of the ring. Hold the material tight around the outside of the ring and bring the edges together where the glue dot is. Press down tightly. If using hot glue, not low temp, let the glue sit for a few seconds before bringing the material around on top of it. It is very easy to burn your fingers. It is good to let the glue cool off just a bit first. You can also use the end of a Popsicle stick or end of a pencil to hold the glue while it is hot and then smooth it down with your fingers once it is almost cool.


  3. Repeat step 2 all the way around the napkin ring until you are back at the beginning.
  4. When you are back to the seam again, overlap the burlap so that it goes over the first seam and cut off any excess. Run a line of glue under the outside seam of the burlap and press down to close.


  5. Repeat with all of the napkin rings.
  6. Measure your ribbon. Cut the ribbon to the length of the circumference of the napkin ring.


  7. Once your burlap is attached, put a dot of hot glue on the seam of the napkin ring. Put the edge of the ribbon on the hot glue, run the ribbon around the napkin ring until you reach the hot glue again. Press the end of the ribbon into the hot glue. If the glue has cooled, put another dot of hot glue on top of the other end and press down.


  8. Once the ribbon is attached, attach your decorative jewelry pieces. Mine had loops on four sides that are used if you using them for jewelry. I cut the loops off using pliers. I used Gorilla Glue to attach the jewelry piece to the napkin ring. I put a small dot of glue at the top and bottom of the jewelry piece and put it on the top of the napkin ring - so the seam is opposite on the back. I held it down for a couple of minutes until it was tacky and then let it sit so the jewelry piece was facing up until it was completely dried - about 2 hours. 

I'm excited to use them on Valentine's Day, but I think I will use them throughout the year too!