Too Many Good Things Out There Not To Share Them With You!

Showing posts with label kids. Show all posts

Wednesday, March 3, 2010

All Things Family

I read quite the post and thought I would share. It only took me about 12 hours to look at all these fun blogs linked to this one. Enter at your own risk!


Welcome to the February 23, 2010 edition of the All Things Family blog carnival. This week, we focused on frugal and money-saving ideas. If you have an article that you would like to submit for a future edition, please check out the All Things Family Blog Carnival.

Frugal Ideas for Parents:

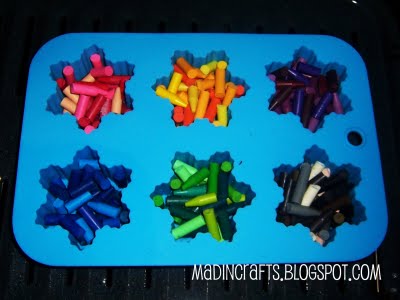
Jessica Hill, one of my favorite dollar store crafters, presents mad in crafts: Make crayons with dollar store molds posted at mad in crafts, a good use for those cute novelty molds they always have at the dollar store.
Here’s a fun and frugal idea! Abigail Bailey presents Make children’s play furniture from milk cartons posted at abigailscraftshowto.com

Shannon presents Low Cost Party Planning Solutions posted at Partyelf, saying, “Here are some low cost solutions to planning a great birthday party for your child,” and provides ideas for Personalized Party Favors on a Budget posted at Partyelf, saying, “Getting personalized party favors for your child’s birthday party does not have to cost a fortune. Here are some low cost ideas starting around $1.”
Speaking of parties, Char Polanosky sent us ideas for 5 Ways to Save Money on Kids Party Decorations posted at Celebrate It, saying, “Creative ways to stretch your birthday party budget!”
Char Polanosky presents Making Kids Lunch Fun with Bento Box Lunches posted at Raising A Healthy Family, saying, “Save money by packing your kids lunches in fun bento style containers.”
Linette G. presents some super cute cupcakes  How To Train Your Dragon~Viking Hat Cupcakes posted at The Kid’s Birthday Fun Review, saying, “These cupcakes are quick and easy, perfect to make just for fun or for a How to Train Your Dragon Party.”

Family Potluck:

Mariana Ashley presents 50 Incredible Ikea Hacks for College Kids posted at AccreditedOnlineColleges.org .
Pamela Jorrick presents Personality posted at Blah, Blah, Blog, a discussion of personality types and how they apply to her.
Gina @ MoneywiseMoms presents Guest Post: Retirement Savings for Stay-at-Home-Moms posted at Moneywise Moms

Karen Eisenbraun presents Plant A Garden For Healthier Children posted at Healthy Theory.
Fred Lee presents Your Public Library: Better than Disneyland posted at Parenting Squad

Sandra Lopez presents 80 Awesome Ideas for All Your Old or Unwanted Books posted at Online Colleges.net

Dana presents An encounter with owls posted at Roscommon Acres, a blog about a nature walk with her children and what they found.
That concludes this edition.

Tuesday, March 2, 2010

Taffy........That YOU Made. Oh yes you can!

OK. Don't think me crazy and just read the post. It's super cute and looks relatively easy to do so read on before you throw it out the window! I would try this with my kids only I think, not my preschoolers from school. It would be like a bad sesame street episode. Read on! I think I'll make this for my sister. She adores taffy and she would be oober impressed by the home made factor. These would be great too as a favor at a birthday party.

Skip to My Lou Blog
Welcome to our Sweat Sweet Shoppe! If you are alarmed by red dye, excessive amounts of sugar and under age workers turn away now!

If not, stick around and see how we made loads of homemade taffy!

Here's our recipe

Homemade Taffy

2 1/2 cups white sugar
3 tablespoons cornstarch
1 cup light corn syrup
1 1/3 cups water
2 tablespoons butter (plus lots extra to butter hands)
1 teaspoon salt
1 - .21oz (6g) package unsweetened, fruit-flavored drink mix (like Kool-Aid) (we used cherry)
1/2 teaspoon vanilla
Butter large jelly roll pan or a cookie sheet with sides.
In a medium saucepan, stir together the sugar and cornstarch.  Add corn syrup, water, butter and salt and stir well until butter is melted. Bring to a boil over medium heat and stop stirring. Cook mixture until candy thermometer read 250 degrees F (120 degrees C). This takes some time to get it to 250 degrees. Once it approaches 250 degrees watch very closely because it cooks quickly at the end.  Immediately remove from heat. Carefully stir in vanilla and drink mix. Stir well. We should have stirred ours more-- notice some bits of drink mix (dark spots) on our taffy. Pour mixture onto buttered baking pan. Allow to cool enough to handle, about 10 minutes.

Directions:

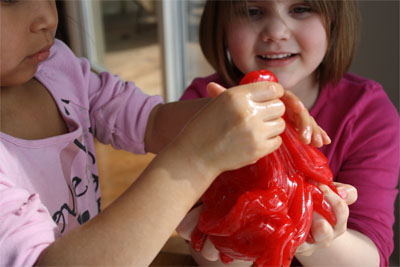
Once the taffy has cooled enough to handle, butter hands and begin pulling. (It starts kind of translucent)

Then pull...and pull...butter hands again...pull...

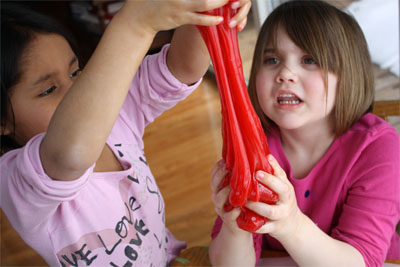
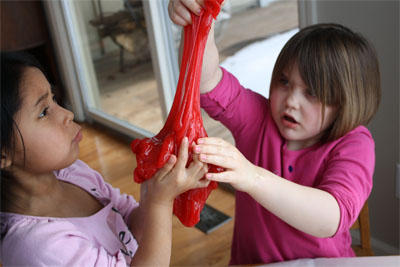
and stretch...pull...more hand buttering...pull...

It will become more opaque and lighten in color depending on the attention span of your workers! This takes about 10-15 minutes of pulling.

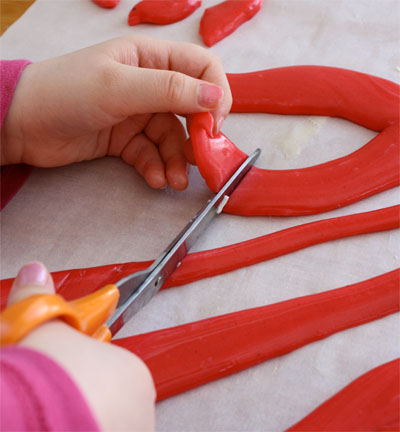
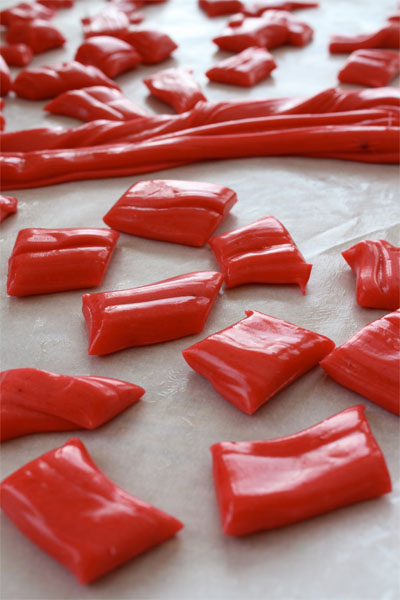
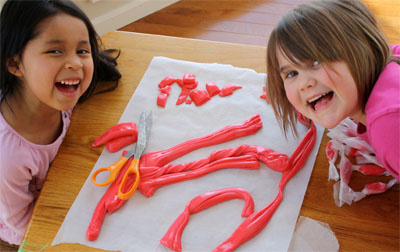
Pull into long ropes and cut with buttered scissors.

and cut!

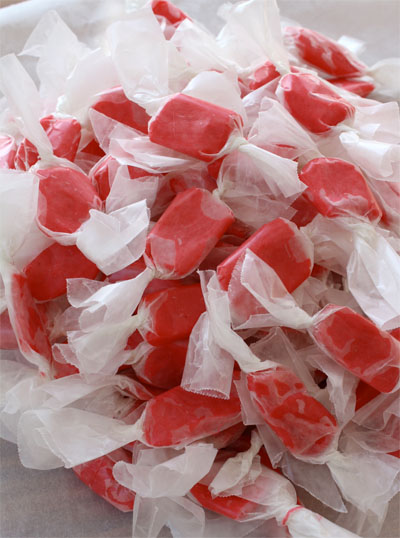
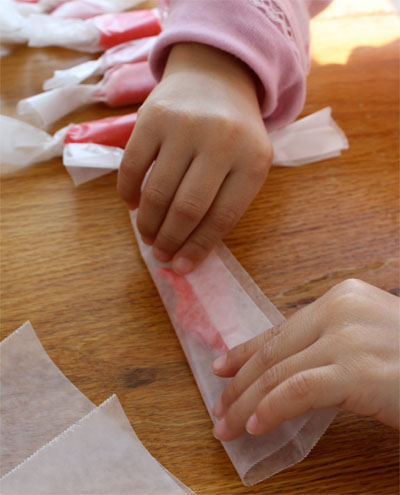
Wrap pieces of taffy in pieces of waxed paper

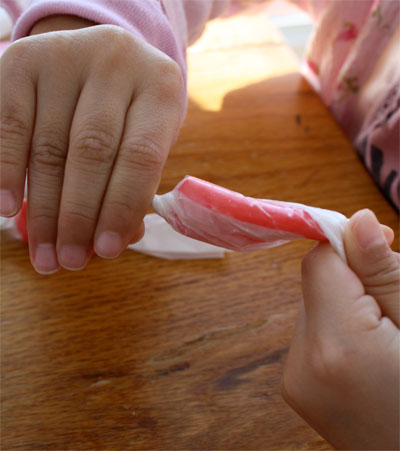
and give it a good twist on each end.

Finished!

Sweet!!

Monday, March 1, 2010

Wall Art Display

 As the thought of an upcoming foster child continues to cloud my mind I was thinking of the ways I could encourage and foster lots of self esteem for the little person God brings us. Displaying and showing we are proud of this little person I know will be so important so here's a little post from How Does She blog. She has some great tips for displaying artwork and I'm sure there will be lots of it around our house! 

How Does She display kid’s art?  I knew I could find a few ideas, I had no idea I would find this many!!!  I am excited to present all these awesome ideas – I am so inspired to get my kids to make more art, just so I can display it!

 #1 Collage It

way to display kids artThis is Alison’s idea to take lots of art, shrink it on the computer and put it into one collage.  Child’s art 18 into 2!

#2 Group together on the wall

I love this idea because it is so easy to update whenever you want and it looks GREAT!
kids drawings as art
 The Style Files shares this picture.  I love all the colors against the white wall.    You can get these curtain holders at Ikea, not online, unfortunately, but if you live by one – lucky you!
work of art lofn
 The Land of Nod
art on wall
display kid art 2
display art magnet wall
display art photo
Cookiemag suggests taking pictures of the art and grouping the pictures together into a display on a cork board

#3 Treat it as art

This frame allows you to easily switch pictures and even store some behind the most recent art being displayed
art display zebra
Blissfully Domestic has a great tutorial on displaying framed art.
art on canvas
Turn it into art on Canvas!!!  This is one of my favorite ideas – pretty much anything on canvas just looks classy.
mykidsartoncanvas has the idea above on their website, you can order from them

OR
get it for free at Canvas People – click here!


 Turn it into custom wall paper art, a laptop skin, or a removable sticky picture at SticViews - You can still get one free – see this post to find out how!
Turn doodles into a real work of art - Lizette from Fine Doodles display art fine doodles.jpgdoes some amazing work with your kid’s doodles – you gotta check out her website!

#3 Take it with you and show it off!

display art jewelry 1
Analiese will turn it into a clay pendant for you
art display silver
or Totally out of Hand will turn it into silver or gold jewelry! 
display art bag
Snap Totes will turn images into bags or pillows – picture your kid’s art on the bag above.

Little Birdie Secrets has a tutorial on how to turn you child’s drawing
art display monster 1
into a stuffed toy
art display monster 2
I made one for my son and he thinks it is the coolest thing! 

Other ideas I found but don’t have pictures for are:

shrink and mod podge onto coasters
Use clipboards as frames – easy to change out
hang them all over your garage walls
use them for wrapping paper
display on picture ledges
upload them to a book printing company and have a nice book of art
laminate them and use as placemats
turn them into a calendar – click here to see how to get a FREE ONE
 cover your coffee table w glass and slide drawings underneath
use a plastic tablecloth over your dinner table and slide drawings underneath
have them made into postage stamps
cut up and use as gift tags

Friday, February 26, 2010

Ice Cream Cone Cakes

This is another secret blog I love. I get good ideas for activities for my class geared around children's literature. Instilling a love for learning and reading is soooooo very important and super fun might I add. I can't wait to get more ideas from her in the future!

Ice Cream Cones w/o the Mess!


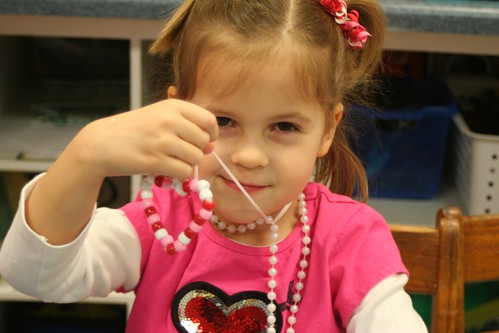
I had E's Valentines Day party today, and it was a huge success! The kids loved their pony bead heart necklaces. I was afraid the craft would be too hard for the kids, but they did great and there were enough moms there to help.

(Isn't my friend's little girl adorable? She and her twin sister are always so well-dressed. :)

The book My Heart is Like a Zoo was also a huge hit. Besides the book and the craft, I was responsible for dessert. At first I planned on keeping it simple with heart jello jigglers. My mom always made these for my class and I have fond memories of "finger jello".

IMG_4305

But then my sister Beth @ The Stories of A to Z twittered (tweeted?) a picture of these Valentines Faux Ice Cream Cones and I fell in love. She hadn't blogged about it yet, so I googled for a recipe and found one at Easy Cake Ideas. It looked easy, so I decided to give it a try. Here's what I did:

The Meringue Tops (do this the night before if possible)

IMG_4285

Ingredients:
  • 3 large egg whites
  • ¼ teaspoon cream of tartar (mine turned out fine without)
  • ¾ cup granulated sugar
  • Piping bag or gallon size Ziploc bag
1. Preheat oven to 200° F

2. In a large bowl beat the egg whites until foamy. Make sure your bowl and mixer are very clean. Any grease will ruin the meringue.

3. Add the cream of tartar and continue beating until soft peaks form.

4. Add the sugar a little at a time and continue beating until the mixture holds stiff peaks when the whisk is lifted from the bowl.

5. Line a cookie sheet with parchment paper or tin foil (not wax paper).

6. Using a piping bag without a tip or a gallon size Ziploc with a 1” hole snipped in the corner, pipe a meringue 'ice cream' swirl in roughly the same diameter as the opening of the ice cream cone.

7. Top each with sprinkles.

8. Bake for 1 ½ hours or until the meringue is dried out and crisp to the touch.

9. Crack the oven door and leave to finish drying out overnight.

The Cake Cones

IMG_4287

1. Using a cake mix, follow the directions up to pouring into the pans.

2. Line up the ice-cream cones on a cookie sheet.

3. Spoon the cake batter into the cones, filling only to the line where the neck of the cone widens out.

4. Bake at 350° F for about 22-25 minutes, until a cake tester comes out clean.

5. Cool completely.

Assemble!

IMG_4290

Spread icing (I used store-bought) on top of the cake cone and then top off with one of the meringue cookies.

IMG_4298

Now they're all ready to pass out to a class of sweethearts! These ended up being a huge hit with E's classmates. They got a kick out of the pretend ice cream, and I heard two little boys exclaim "it's not messy!"

The whole process took most of the afternoon yesterday and much of the morning, so I don't plan on doing this again anytime soon, but I am proud with the way they turned out. If you want a simpler solution, my sister used marshmallows inside the cones instead of cake and added M&Ms to the meringue.

I read Amilia Badilia's First Valentine, Valentine Mice, and Mouse's First Valentine for my class on our special party day just in case you wanted to know.

Monday, February 15, 2010

Olympic Sized Fun

I have to admit I have not watched one stitch of the olympics this year. I know, I know. They're important and I haven't exactly had the most free time in the world in the past few months minus a trip to Anniston, AL. So I'll catch the highlights at some point and until then at least you can have a little olympic fun yourself.
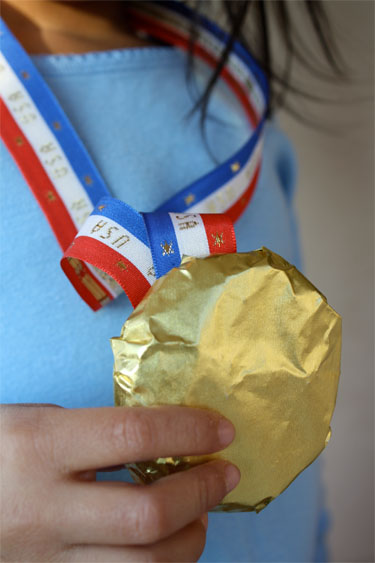
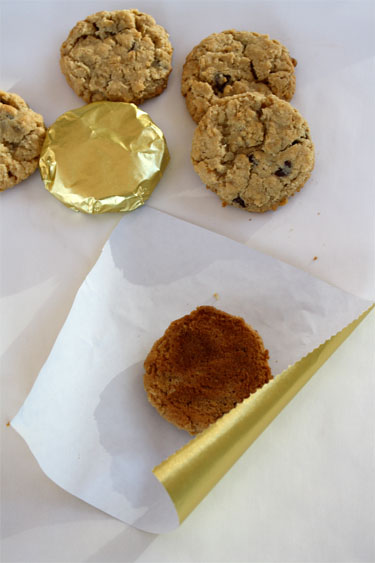
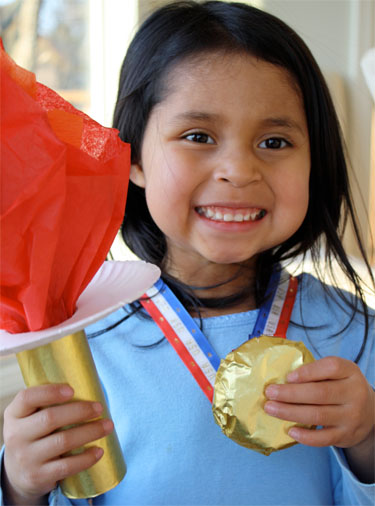
Go for the gold with these Olympic medal cookies!
By Cindy Hopper

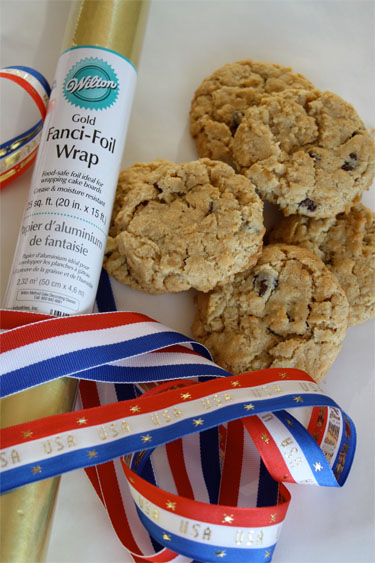
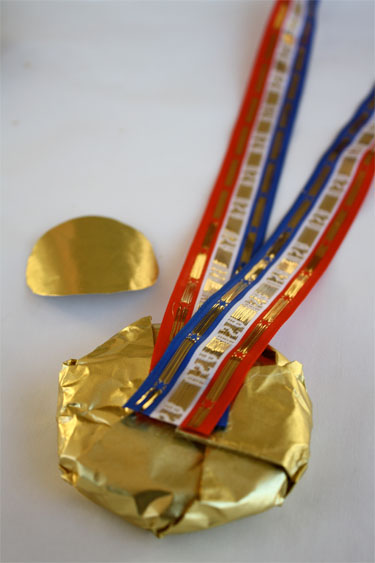
Make your favorite cookies and gather some gold foil, patriotic ribbon and hot glue.

Wrap cookies in the gold foil.

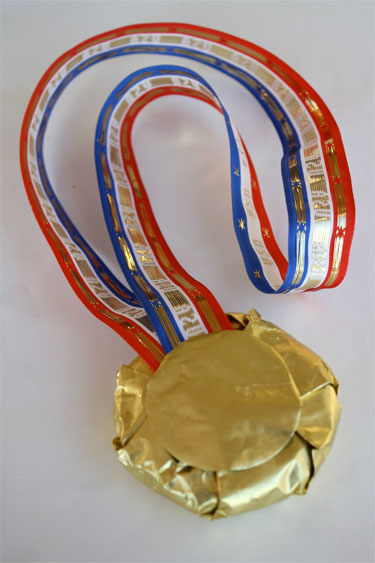
Fasten with a drop of hot glue, making sure not to touch the cookie. Attach ribbon to back of wrapped cookie with hot glue.

Finish off back by gluing a circle of the gold foil on top of the ribbon. Kids might want to embellish the front with a picture of their favorite sport.

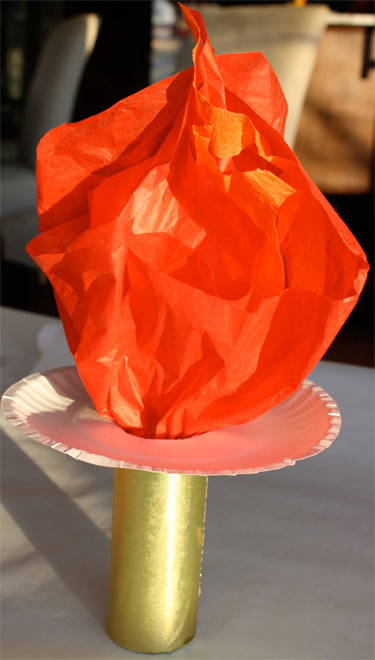
Get fired up with an Olympic torch!

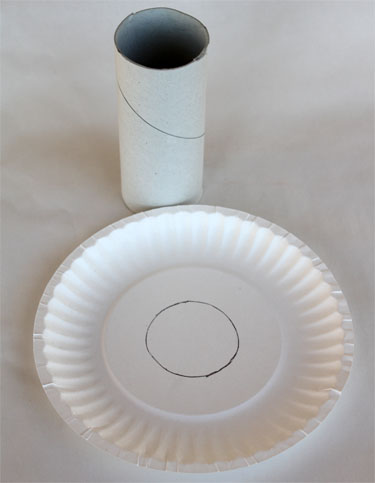
Draw around the end of a toilet paper tube in the center of a small paper plate.

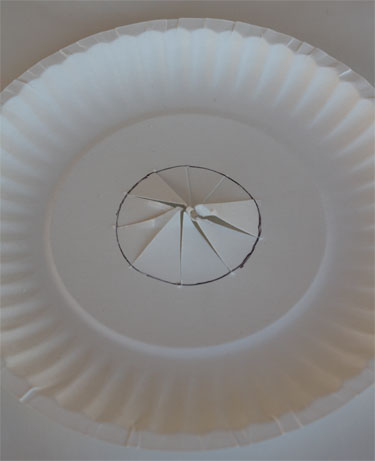
Pierce center of plate with scissors and cut slits to the edge all the way around the circle.

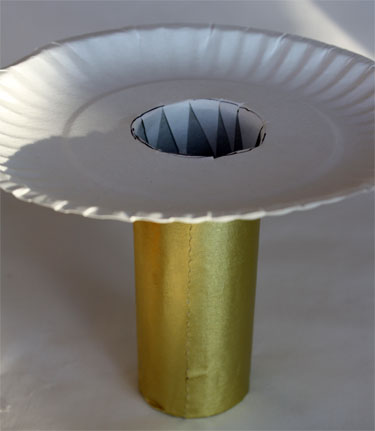
Cover toilet paper tube with gold foil and then glue plate to top of the tube by folding cuts into the center of the tube. (This takes a generous amount of glue stick)

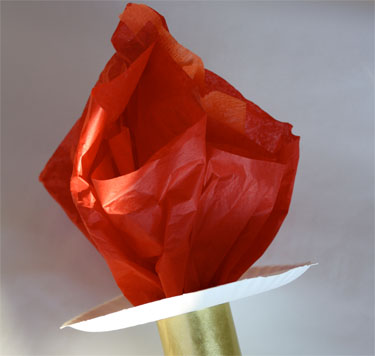
Stuff red and orange tissue paper into the center of the tube.

Let the games begin!

Wednesday, January 27, 2010

Another Valentine's Day Classic

Here's another one we probably made as kids but have not in a while. So here's the tutorial in case you forgot from Skip to My Lou. I'm thinking about adding letters to the mobile and using my cricut I received for Christmas -- thanks mom and dad!!!

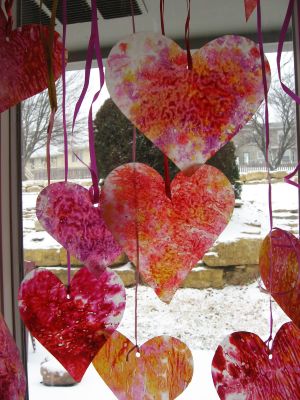
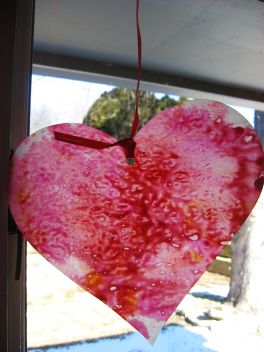
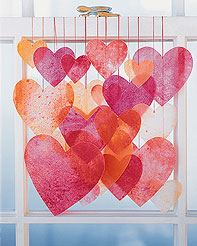
Crayon shavings melted between wax paper and then cut into hearts make a beautiful display in windows. This is an oldie but goodie craft that we love. Here are ours made with lots of kid help! I can't think of anything more cheerful or happy hanging from a window.
crayon-hearts-1.jpg
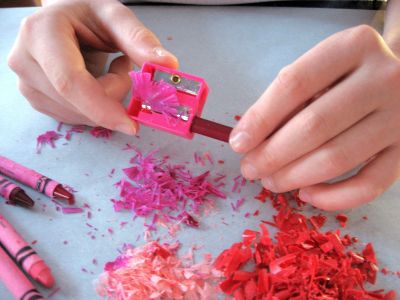
We made lots of crayon shavings with a pencil sharpener.
crayon-hearts-2.jpg
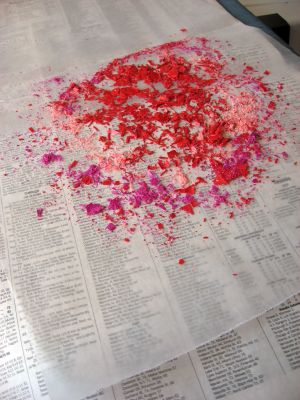
Place shavings on a piece of wax paper.
crayon-hearts-3.jpg
Either place another piece of wax paper on top or fold over the edge to cover all of the shavings.
crayon-hearts-4.jpg
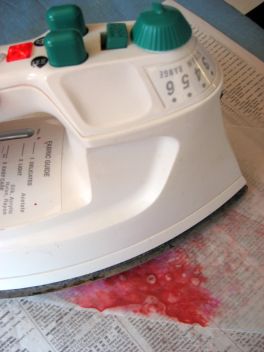
Iron on the lowest setting for about 1 second. You can go always go longer after checking to see if the shavings have melted. Be careful to not burn the wax paper. It is a good idea to do the ironing on a piece of newspaper. Some shavings could leak out of the sides and it does leave a residue underneath the wax paper. If you are worried about your iron, just place your wax paper between two sheets of newspaper or scrap paper.
crayon-hearts-5.jpg crayon-hearts-6.jpg
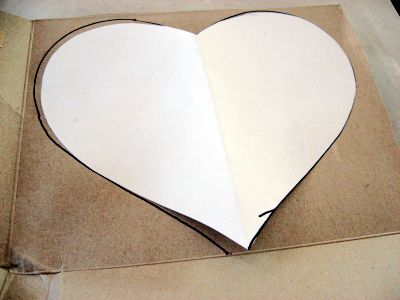
I think it is easiest for kids to trace around cardboard so I took cereal boxes and cut out heart shapes to be used for patterns. This is where you get variety so let the kids draw the hearts.
crayon-hearts-7.jpg
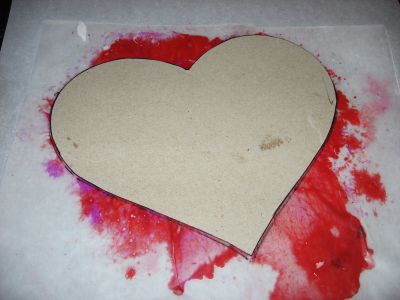
Draw around your pattern.
crayon-hearts-8.jpg
Cut out, hole punch and tie on ribbon, thread or fishing line. Hang!
crayon-hearts-10.jpg
Martha has directions and a gorgeous display at her place.
gt076_crayheart01_l.jpg