Too Many Good Things Out There Not To Share Them With You!

Friday, January 8, 2010

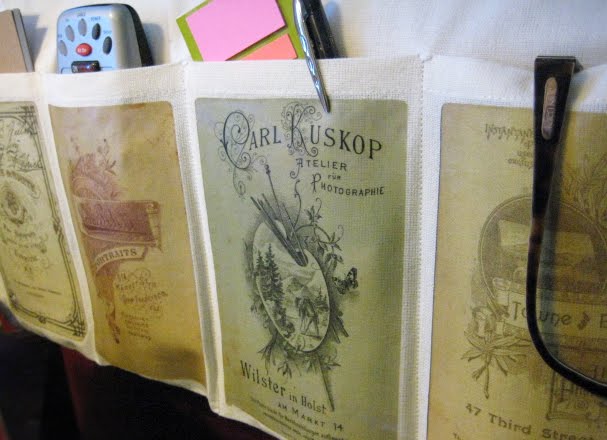
Pretty Cute Organizer

Make an Organizer from Cloth Napkins

napkin-organizer
Ready to organize in the new year? Here’s something to distract you just a little bit longer: make your own organizer out of cloth napkins. This is another of Cathe Holden’s amazing projects over at Just Something I Made. She designed this project as an over-the-arm organizer for an easy chair or couch, but you could also modify it to make a hanging organizer for your wall. She also provides beautiful vintage images for you to use for the iron-ons. [Easy napkin organizer instructions here]
Project Estimate:
  • 2 cloth napkins, $1
  • Iron-on transfer paper, about $1 per sheet
  • Sewing machine and thread, on hand
Total: $2
This post sponsored by:
Fabric.com Coupon Corner

Thursday, January 7, 2010

New Year's Resolution


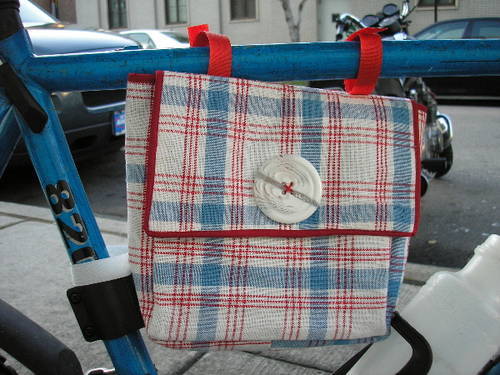
I want to ride my bike more in 2010! I think I’d ride it even more if I made one of these! Craftster user Redux Fashions made this cute bicycle frame lunch bag tote using stuff (placemats, our favorite!) purchased at the dollar store. Love it – it’s super stylin’! The pattern can be found online at Evil Mad Scientist. [bicycle lunch bag pattern] [dollar store version of bicycle lunch bag]
Project Estimate:
  • 2 placemats, $1 each
  • Velcro-style tape, $1
  • Velcro-style cable ties, $1
  • Buttons, on hand or $1
Total: $4 and up

Suer Cute Hairbow Thingy

I have a friend who is knocking at the door of "I'll have my first child, please and thank you." She has been talking about wanting one of these in her sweet little bundle of joy's room and I have found the prefect little Hair bow Organizer at Becky Ann Designs blog. I have done something similar to this for a jewelry organizer so this should be a breeze. Can you imagine all the fun things you could clip to this. I thought about doing one with cute little clothes hangers to hang photos. The options are so many. So here it is for you to try out too.


Here is what you will need:
Canvas - 11" x 14" from Hobby Lobby (2 pk $8.99 and I used a 40% off coupon)
Fabric - from my stash
Grossgrain Ribbon - from my stash
Staplegun

First, lay the canvas on your fabric and trim it so that you have plenty to wrap over the edges.

Time for the staplegun! I started with the long sides, then did the corners and finally stapled the middle of the short sides. Just make sure you stretch it tight all the way around.

Here is the front once it is all stapled.
Then, just cut your ribbon to the length needed, staple it to the back of the canvas. I am going to add a picture frame hook to the back and it will be completely done.


Cute right? Have fun making it. I know I will!

Wednesday, January 6, 2010

OMG Gummies

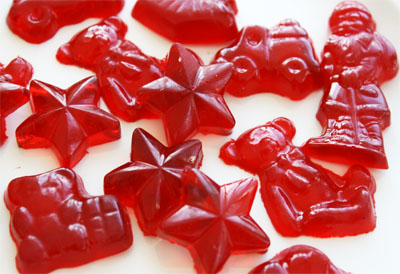
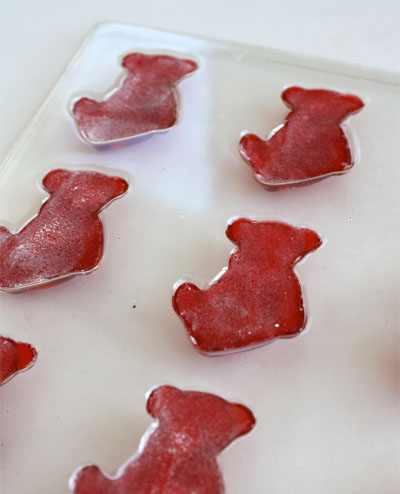
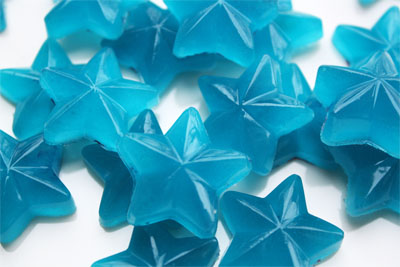
OK, I have to try these out so I thought you needed to see them first. I found them over at Skip to My Lou. They are sooooo cute. I'll have to make a few batches fr our upcoming bear picnic in class for a special snack. I think you can find these molds at the Dollar Tree right now so don't be shy. I have never used the molds before so maybe you guys can comment on their ummmmm cooperation. But I will be giving these a try like I said and I already have most of this stuff on hand. I'm sure the candy companies are fuming right now as we are plotting to never again pay their prices for gummy candies. Hooray! So here's how:

Homemade Gummi Candy


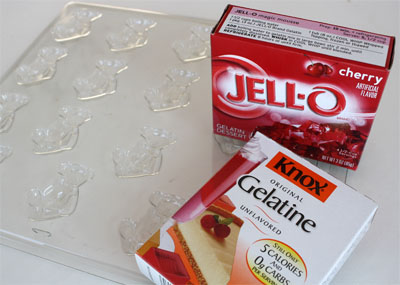
All we needed was 1 -3 oz box of flavored gelatin and 2 - 1/4 oz  packages of unflavored gelatin, water and candy molds. (we used two candy molds)

Place 1/3 cup water in a small sauce pan. Sprinkle the Jello and  unflavored gelatin over the water. Let sit 5 - 10 minutes. (If you like chewier gummi candy add in another packet of unflavored gelatin.)
Place sauce pan over medium heat and stir until gelatin is dissolved, about 2-5 minutes. When mixture is liquid and all gelatin has dissolved, remove from heat.  Let cool a minute and then pour into a container that is easy to pour from.  I use a small ceramic creamer pitcher.

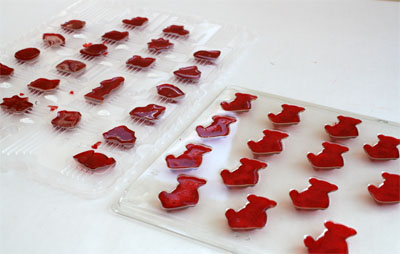
Fill molds. If you save the inside of the advent calendar for  projects like do, it works perfect! The sheet of star molds worked a bit better than the bears because they are a bit deeper. However, I must say we were just needing an activity so our standards were pretty low--- we thought they all turned out great!

Allow to cool completely, about 20 minutes. They may be placed in a refrigerator for about 10 minutes if the kids are eager.
Once cool, the backs can be lightly dusted with corn starch, if desired.

Peel the gummi candy out of the molds. Don't be shy, you won't hurt them when peeling them from the molds. No need to oil the molds!

Enjoy!

Make homemade stickers with the unused unflavored gelatin packets.

Notes: My son felt the blue ones weren't flavorful enough. Next time we will try 2 boxes Jello, 3 packages of unflavored gelatin and 1/2 cup water.

Tuesday, December 29, 2009

Cute Little Bow or Brooch


Another from Skip to my Lou. I think I will make a few for my niece. 


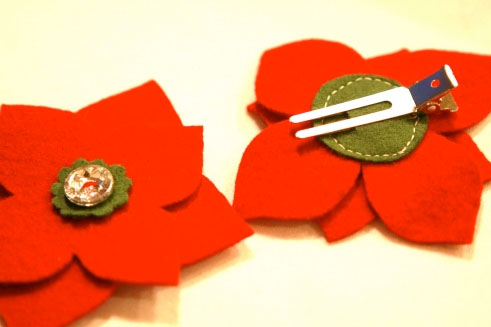
I am thrilled to share the cutest little project from Calli at Make It Doblog, a felt poinsettia hair clip.  I am hoping to make one of these today for my daughter to wear on Christmas Eve.
Be sure to visit Make It Do, her blog is overflowing with creative ideas. Calli says, "In this blog I want to explore how happiness can come from simple things, and how good old fashioned hard work and resourcefulness might just be making a welcome comeback…."
Calli writes...
Yesterday, my girls and I were working on a few Christmas gifts for their friends.  One thing led to another and I found myself making yet another flower pin.  This time a Poinsettia.  I loved this project and ended up making two for my girls, and plan on making more.  They are perfect as a broach or as a hair clip.
IMG_8361
Here’s what you will need:
  • Small amount of red wool felt (I used scraps from another project.)
  • Very small amount of green wool felt (also scraps)
  • button
  • pin or hair clip
  • freezer paper
  • template  here is mysimple template, but I also found this wonderful template from Kaboose.  It has a few more petals than my simple flowers, but that might look even better, here’s the link: Kaboose Poinsettia Template
IMG_8373
1.  Start by tracing your pattern onto the paper side of a piece of freezer paper.
IMG_8375
2.  Cut out your template, and place it on your wool, waxy/shiny side down.
IMG_8378
3.  Using an iron set to wool, iron on the template.  It will gently stick to your fabric.
IMG_8382
4.  Using good scissors, cut out around the template.
IMG_8385
5.  Peel the template away from the wool.  It doesn’t leave a mark.  Isn’t that cool?
IMG_8387
6.  Repeat with the smaller flower.  I just set the button down to see how it would look.
IMG_8388
7.  Cut a 1 1/4 inch circle out of red or green felt.  Cut two small slits in the circle, just wide enough to slip a hair clip through.  This is for the back of the flower, on which to attach the clip or pin.
IMG_8394
8.  Using just the bottom flower, stitch the circle around the back of the flower.  I used white thread to show the stitching better in the photo… Yah, that was it.  It wasn’t because my machine was already threaded with white and I was lazy.  That wasn’t the reason at all.  I was just thinking of you.
9.  Somehow I missed taking a picture of cutting out the green center of the flower.  I cut my green with a fluted edge, which was a little tricky and requires good scissors.  You can also cut it in a circle, but in that case, I would choose a button with a fluted edge.  I was dying to try pinking scissors, but I don’t own any.  So I just cut the fluted edge out carefully.  Sometimes you just need to make it do.  The finished green center was a 7/8 inch circle fluted.
IMG_8405
10.  Layer just the smaller top flower, with green center and button on top.  And stitch together going through all three layers.
IMG_8406
11.  Glue the bottom and top flowers together using hot glue.

There’s a front and back view, with a hair clip attached.  I like that this flower is flexible, I can easily pull out the hair clip and I can slip in a broach pin to wear on a sweater, hat or scarf.
IMG_8362
Here it is pinned on a sweater…
IMG_8422
Thanks to an idea a reader told me about on Craftzine, I also thought this would make a perfect topper for a gift.  That way the wrapping is actually like giving another gift.  (Using cheap yarn is much, much cheaper than ribbon!)
Monday, December 28, 2009

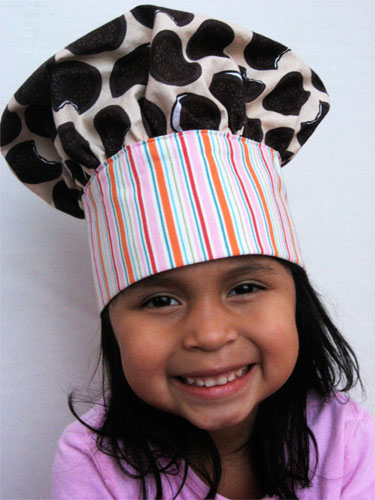
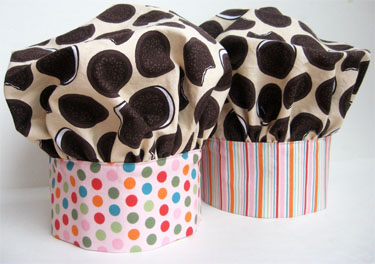
Cute Little Chef Hat


This one comes from Skip to My Lou.
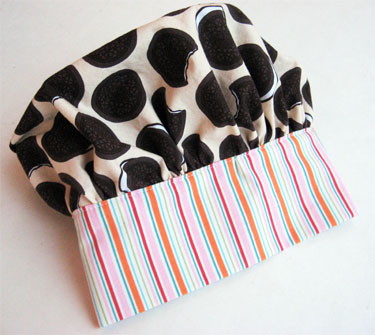
These chef hats were  gifts for a couple of sweet girls. I packaged them with cookie decorating supplies (and hopefully will make them matching aprons in the future).

Chef Hat Instructions

Supplies:

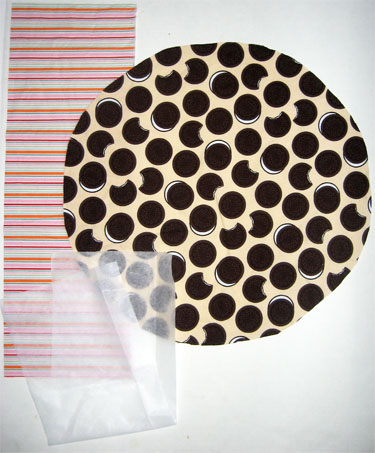
1 -  18" circle
1 -  8" X 24" rectangle
1 - 8" X  24" lightweight to medium weight iron on interfacing
dental floss
1/2 inch Velcro (about 12")
3" piece of double fold bias tape

Instructions:

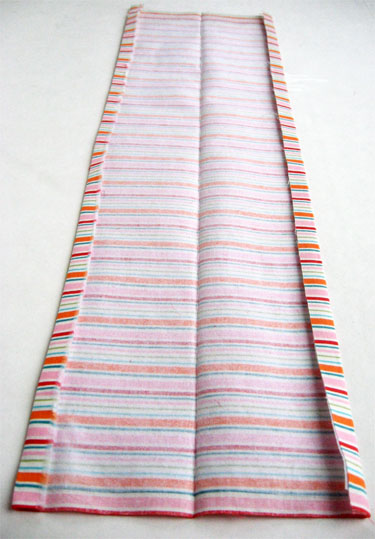
Iron interfacing to 8" X 24" piece following manufacture's instructions. Press  fabric in half lengthwise and press each edge under 1/2".

Fold piece right sides together, starting 1/2" down from open side, stitch across each end. Turn right side out.

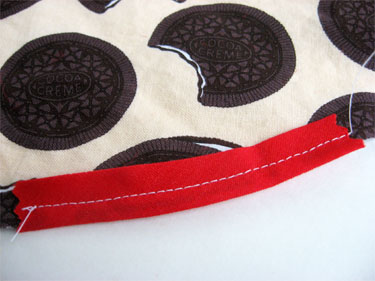
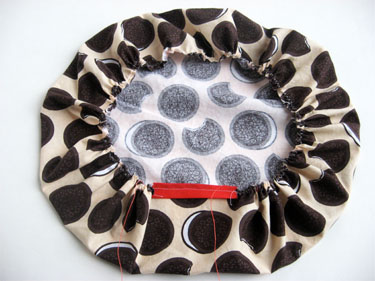
Stitch a 3" piece of bias tape around an edge of the circle.

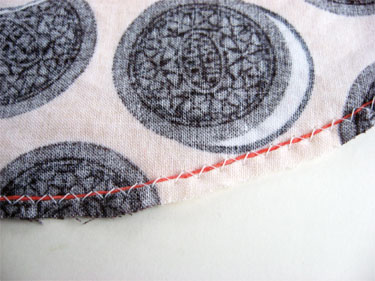
Zig zag stitch over a piece of dental floss starting and stopping on each side of bias tape.

Gather.

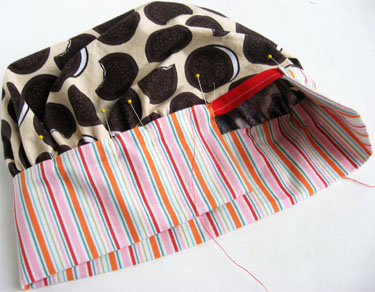
Pin band piece around the gathered edge. Find center of band and center of top piece and begin pinning there.  Adjust gathers until the band fits the gathered edge, starting at stopping about a 1/4" over the bias tape on each side (notice how the 1/2" that wasn't sewn on each end neatly slips around the bias tape). Pin heavily to keep in place.  This takes some adjusting but it is so nice to have all the unfinished edges covered.

Sewing very close to the edge, sew band to top of hat, removing pins as sewing to keep band flat. It might be necessary to slightly pull the band to keep it smooth.

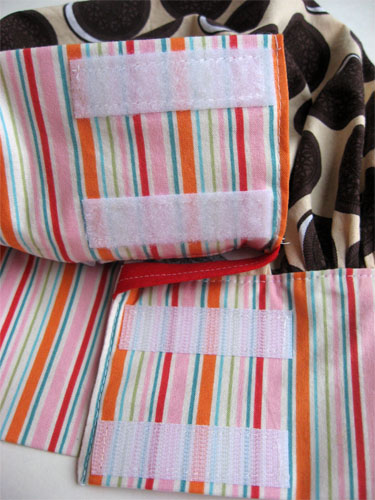
In the back fold left side over as far as the bias tape opening will allow on top of right side. Place Velcro in this overlapping area and sew all four pieces to hat band.

Sew along each edge of each end if desired, to close area placed over bias tape.

Finished!

Sunday, December 27, 2009

Jeweled Frame


Disney at Ruffles & Stuff came up with a quick and easy (and cheap!) way to make glamorous gemstone frames. Her secret ingredient? Those flat glass marbles you can find in the flower arranging section of the dollar store. This is possibly the best use of these marbles I’ve ever seen! [click here for bejeweled frame tutorial]
You can find a huge array of frames at the dollar store, as well as the glass marbles you need for this project. Disney recommends hot glue for this project because it doesn’t remove the spray paint. Also, in her example shown above, she used embellishments like faux flowers and bows.
Project Estimate:
  • Frame, $1
  • Glass marbles, $1
  • Spray paint, optional, $1 and up or on hand
  • Additional embellishments, on hand or $1 and up
  • Hot glue, on hand
Total: $2 and up